Tags: Visual edit apiedit |
B666 (Message Wall | contribs) (image and links) |
||
| (43 intermediate revisions by 9 users not shown) | |||
| Line 1: | Line 1: | ||
| + | {{UpdateNeeded|reason=The displayed tokens need an update.}} |
||
| + | |||
[[File:Front_Cover.jpg|center|700px]] |
[[File:Front_Cover.jpg|center|700px]] |
||
| + | ==Basic Information== |
||
| − | ==About== |
||
| ⚫ | {{tocright}}To earn Gold, [[Hammers]], XP Potions, [[Evos]], [[Runes]] and [[Materials]], they must fight in Dungeons within the campaign map. Tapping the Campaign button will reveal a presented map in which there are several areas to choose from, each representing a Chapter. Each Chapter contains a list of Dungeons. Once a Dungeon is beaten the next Dungeon is unlocked. Completing the Chapter unlocks the next Chapter. |
||
| − | {{tocright}} |
||
| ⚫ | To earn |
||
| − | Most |
+ | Most Dungeons require 5 [[Stamina|S]][[Terminology#Energy|tamina]] to enter. However, the last Dungeon of every Chapter requires 7 [[Stamina]]. |
| + | |||
| + | For Island Dungeons other than Boss Island Dungeons: The first Dungeon requires no [[Stamina]] and 1 Loot Key to Quick Loot, the second one requires 5 [[Stamina]] and 2 Keys, the third requires 10 [[Stamina]] and 3 Keys, the fourth requires 15 [[Stamina]] and 4 Keys, and the last Dungeon requires a whopping 20 [[Stamina]] and 5 Keys. |
||
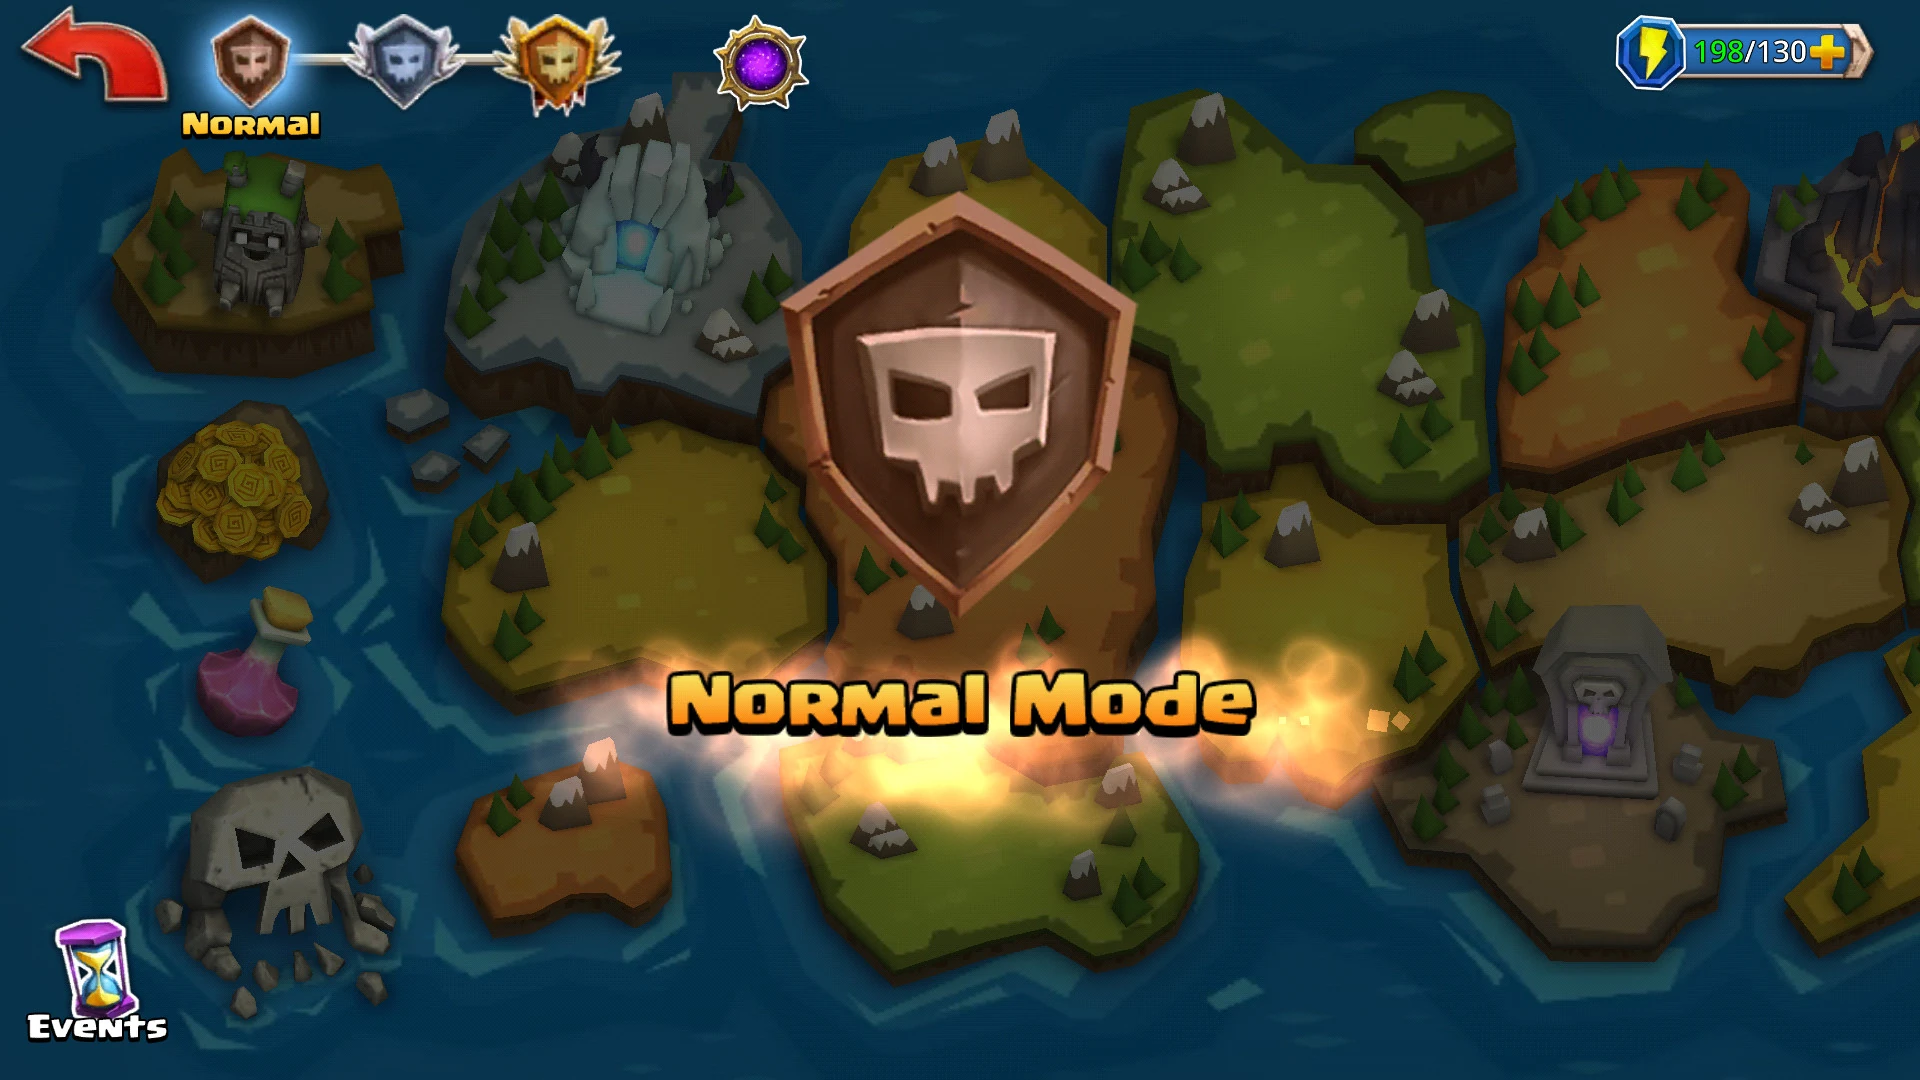
==Modes== |
==Modes== |
||
| − | The |
+ | The Campaign Dungeons (excluding Gold Island, XP Island, Evo Island and Boss Island) are available in three levels of difficulty: |
| − | * <span style="margin-left:8px">[[File:Normal Mode Icon.png| |
+ | * <span style="margin-left:8px">[[File:Normal Mode Icon.png|x30px]]</span> '''Normal mode''': This mode is for level 1 to 60. It's described here. |
| − | * [[File:Challenge Mode Icon.png| |
+ | * [[File:Challenge Mode Icon.png|x30px]] [[Challenge Mode]]: This mode unlocks at [[Leveling#Player_Level|Player Level 30]] and is for Heroes up to level 72. It offers [[File:Orb.png|25px]] [[Blessing of the Seeker|Blessings of the Seeker]], {{Icon|Leonidus}} tokens and other rare Hero Tokens. |
| − | * [[File:Boss Mode Icon.png|x30px]] [[Boss Mode]]: Unlocked at Player Level 60, this is the place where you will |
+ | * [[File:Boss Mode Icon.png|x30px]] [[Boss Mode]]: Unlocked at Player Level 60, this is the place where you will find the hardest Dungeons with the most dangerous enemies and sweetest loot such as [[Epics]] (only found on [[Boss Island]], unlocked at Player Level 50). |
| + | * [[File:Age of Chaos Mode Icon.png|x30px]] [[Age of Chaos]] expansion: Unlocked at Player Level 70, you can find doom and chaos in these infected dungeons. |
||
==The Battle== |
==The Battle== |
||
| ⚫ | |||
| − | In preparation for the |
+ | In preparation for the Dungeon battle, up to four [[Heroes]] are chosen to fight through the Dungeon. In addition,up to three [[Potions]] are added to the bag to assist with the vigor of the battle. You can choose which potions to bring to the battle. |
| + | |||
| + | [[File:Auto_Attack_Icon.png|thumb|left|52x52px]] When the battle starts, there are two special icons located on the bottom of the screen. The sword icon on the right is an auto-attack button that forces all of your Heroes to perform their Basic Attack on all enemies (silver sword) or perform their special attacks (golden sword). The basic attack option should be used only if your Heroes are strong enough to defeat the enemies. The auto-attack mode is cancelled if one Hero has died or in low HP.<br> |
||
| − | [[File: |
+ | [[File:Friends_Hero_Summon_Icon.png|thumb|left|52x52px]] The second icon is a yellow button with a dark silhouette of a gladiator. It's located at the right end of the hero's special attack buttons. This icon allows the player to summon a Friend's [[Champion]] for help from their Friend List. That friend's featured hero (choosable) will perform their 1st special attack. |
| ⚫ | Occasionally, the player will encounter a [[Treasure Room]] within a Dungeon. The player has the option to choose one of the three chests provided, which is added to their rewards at the end of a successful completion of the Dungeon. One of the three chests can contain a [[Hero Token]] of a [[Bronze Hero]], [[Silver Hero]] or [[Gold Hero]]. More common rewards are [[File:Gold.png|x25px]] Gold, [[File:Hammer Icon.png|x25px]] [[Hammers]] or an [[File:Nature Evo Monarch.png|x25px]] [[Evo]]. |
||
| − | [[File:Friends_Hero_Summon_Icon.png|thumb|left|52x52px]] |
||
| − | The second icon is a yellow button with a dark silhouette of a gladiator. This icon allows the player to summon a friend's [[Champion]] for help from his Friend List. |
||
| ⚫ | |||
==XP Island, Gold Island, Evo Island and Boss Island== |
==XP Island, Gold Island, Evo Island and Boss Island== |
||
| − | For additional information on the individual islands, visit the following pages: [[File:Potion 100XP Icon.png|25x25px]] [[XP Island]], [[File:Gold |
+ | For additional information on the individual islands, visit the following pages: [[File:Potion 100XP Icon.png|25x25px]] [[XP Island]], [[File:Gold.png|25px]] [[Gold Island]],[[File:Nature Evo.jpg|25px]] [[Evo Island]] and [[Boss Island]]. |
| − | These are special |
+ | These are special Dungeons that specifically allow you to get [[Gold]], [[Potions]], [[Evos]] and [[Epics]]. [[Evo Island]], [[XP Island]] and [[Gold Island]] Dungeons are useable once every day. Keep in mind though, the Dungeons in [[Gold Island]] and [[XP Island]] are for players with higher level Heroes. |
| − | [[Evo Island]] and [[Boss Island]] are |
+ | [[Evo Island]] and [[Boss Island]] are slightly different from the other two Islands. [[Evo Island]] is accessible on Monday to Friday only. Besides, every day from Monday to Friday, each day will have a different Element (Monday: Dark, Tuesday: Water, Wednesday: Fire, Thursday: Nature, Friday: Light. This is for both enemies and Evos). Boss Island Dungeons require 8 Loot Keys to Quick Loot but can be run through more than once every day. |
| − | * Monday: {{icon|Dark}} |
||
| − | * Tuesday: {{icon|Water}} |
||
| − | * Wednesday: {{icon|Fire}} |
||
| − | * Thursday: {{icon|Nature}} |
||
| − | * Friday: {{icon|Light}} |
||
==[[File:Epic Skull.png|35px]] Epic Dungeons== |
==[[File:Epic Skull.png|35px]] Epic Dungeons== |
||
| ⚫ | In Epic Dungeons (5-10 Reflection Halls, 11-7 Lair of the Lich, [[16-10 Devourer of Flames]] and 21-10 Garden of Evil),(Normal Mode and Challenge Mode ONLY) the player's Heroes fight '''without the assistance of Friends' Champions'''. These Dungeons are not only the last levels of their respective Chapters (therefore require 7 [[Stamina]] to begin), but also significantly more challenging for the player compared to other levels. Potions are allowed in these levels, except the Elixir of Life. That means when your Hero team is defeated in an Epic Dungeon you '''cannot continue''' and the battle is over. Epic Dungeons also contain Epic Bosses, which are far deadlier than typical Bosses as they have many more Abilities and their Attacks are significantly strengthened. |
||
| − | [[File:Devourer_of_Flames.jpg|thumb|250px|Epic Dungeon]] |
||
| + | |||
| ⚫ | In Epic Dungeons ( |
||
| ⚫ | |||
| + | [[File:Normal Mode enter map.jpg|thumb]] |
||
| ⚫ | [[Events]] are released every few days and offer challenges in separate [[File:Events Icon.jpg|x25px]] events dungeons where you can earn tokens for featured Heroes. During [[:Category:Portal Events|Portal Events]] these heroes have an increased appearance rate in [[File:Portal Summon Gem.png|25px]] [[Portal Summon]]s. You can enter event dungeons by tapping on the '''hourglass''' or via the event banner. |
||
==Materials== |
==Materials== |
||
| − | There are |
+ | There are 24 materials (including those in Challenge Mode) that can be looted in the corresponding area type of the dungeon. The lesser material is used to [[Crafting|craft]] greater material, [[Runes]] and [[Epics]]. |
{| class="article-table article-table-selected" |
{| class="article-table article-table-selected" |
||
! Dungeon Type |
! Dungeon Type |
||
| ⚫ | |||
| − | ! Lootable Materials |
||
| + | ! colspan=2 | [[File:Challenge Mode Icon.png|x30px]] [[Challenge Mode]] |
||
| − | ! |
||
|- |
|- |
||
| − | |Crypt |
+ | |class="crypt"|Crypt |
| − | |[[File:Mushroom.png|40px]] Mushroom |
+ | | [[File:Mushroom.png|40px|link=]] [[Mushroom]] || [[File:Abyssal Crystal.png|40px|link=]] [[Abyssal Crystal]] |
| + | | [[File:Pyre Embers.png|40px|link=]] [[Pyre Embers]] || [[File:Grave Iron.png|40px|link=]] [[Grave Iron]] |
||
| − | |[[File:Abyssal Crystal.png|40px]] Abyssal Crystal |
||
|- |
|- |
||
| − | |Dark Forest |
+ | |class="darkforest"|Dark Forest |
| − | |[[File:Mandrake Root.png|40px]] Mandrake Root |
+ | |[[File:Mandrake Root.png|40px|link=]] [[Mandrake Root]] || [[File:Amber Crystal.png|40px|link=]] [[Amber Crystal]] |
| − | |[[File: |
+ | | [[File:Ebony.png|40px|link=]] [[Ebony]] || [[File:Silver.png|40px|link=]] [[Silver]] |
|- |
|- |
||
| − | |Forest |
+ | |class="forest"|Forest |
| − | |[[File:Green Ivy.png|40px]] Green Ivy |
+ | |[[File:Green Ivy.png|40px|link=]] [[Green Ivy]] || [[File:Natural Crystal.png|40px|link=]] [[Natural Crystal]] |
| − | |[[File: |
+ | | [[File:Fresh Earth.png|40px|link=]] [[Fresh Earth]] || [[File:Iron.png|40px|link=]] [[Iron]] |
|- |
|- |
||
| − | |Ice Cave |
+ | |class="icecave"|Ice Cave |
| − | |[[File:Snowbell.png|40px]] Snowbell |
+ | | [[File:Snowbell.png|40px|link=]] [[Snowbell]] || [[File:Ice Crystal.png|40px|link=]] [[Ice Crystal]] |
| + | | [[File:Pure Frost.png|40px|link=]] [[Pure Frost]] || [[File:Frozen Steel.png|40px|link=]] [[Frozen Steel]] |
||
| − | |[[File:Ice Crystal.png|40px]] Ice Crystal |
||
|- |
|- |
||
| − | |Lava Cave |
+ | |class="lavacave"|Lava Cave |
| − | |[[File:Wildfire Blossom.png|40px]] Wildfire Blossom |
+ | | [[File:Wildfire Blossom.png|40px|link=]] [[Wildfire Blossom]] || [[File:Flame Crystal.png|40px|link=]] [[Flame Crystal]] |
| − | |[[File:Flame |
+ | | [[File:Brimstone.png|40px|link=]] [[Brimstone]] || [[File:Flame Steel.png|40px|link=]] [[Flame Steel]] |
|- |
|- |
||
| − | |Mountain |
+ | |class="mountain"|Mountain |
| − | |[[File:Monkshood.png|40px]] Monkshood |
+ | |[[File:Monkshood.png|40px|link=]] [[Monkshood]]|| [[File:Quartz Crystal.png|40px|link=]] [[Quartz Crystal]] |
| − | |[[File: |
+ | |[[File:Spring Water.png|40px|link=]] [[Spring Water]] || [[File:Pure Gold.png|40px|link=]] [[Pure Gold]] |
|} |
|} |
||
==Runes== |
==Runes== |
||
| + | [[File:Rune.png|thumb|60px|link=Runes]] |
||
| − | All |
+ | All Rune chests at the end of Campaign Dungeons contain Lesser [[Runes]] (Normal Mode), or Improved [[Runes]] (Challenge Mode). The rarity of these [[File:Rune.png|x25px]] [[Runes]] is either Common, Uncommon or Rare, with a maximum of 3 stars. The Rune types found in Campaign Dungeons are either Battle, Bulwark, Focus or Life. |
| + | Very rarely, after you complete a Dungeon Room, you will find a mysterious Rune chest that when opened, will give you only a random type of Rune. |
||
| − | Rune chests which sometimes can be found in any other room of a dungeon (except the boss room) may contain Lesser Runes but have a little chance for Improved Runes. These runes have a chance for a higher rarity (Heroic or Legenary) and can have up to 5 stars. |
||
| − | You can salvage the |
+ | You can salvage the [[Runes]] found in Dungeons and use the [[Shard]]s and [[Binder]]s collected from salvaging them to craft basic [[Runes]] of better quality (Heroic or Legendary rarity, up to 5 stars) and other, more special types such as Power, Precision, Elusive, Aegis and Destruction. There are also the unique Soul Stealer, Tactics, Insight, Vampiric, Planning and Thought, as well as the extremely powerful Guardian, Corruption, Survivor and Incineration. |
| + | Some Runes, such as Warrior, Tank, Healer, Hero, Festive and Community, are only found in events. Duelist and Champion Runes can be obtained from My Dungeon Seasons. See [[Runes]] and [[Rune Type List]] for more details. |
||
| ⚫ | |||
| − | {{Thalia |
||
| ⚫ | |||
| + | == Hammers == |
||
| ⚫ | |||
| + | [[File:Hammer Icon.png|thumb|link=Hammer]] |
||
| + | [[Hammers]] can be obtained from wooden chests found in the middle of any dungeons. You can use these [[Hammers]] that you get from completing or [[Quick Loot]]ing dungeons to reinforce your chest in [[My Dungeon]]. If you do not reinforce your chest, other players can raid your dungeon and if they win against your defenders, they will steal some of your Daily Rewards for My Dungeon (Gold and Honor). |
||
| ⚫ | |||
| ⚫ | |||
| ⚫ | |||
| ⚫ | |||
| − | Level range: 4 to 6 |
||
| ⚫ | |||
| − | Required Player Level: None |
||
| ⚫ | |||
| ⚫ | |||
| + | Recommended level range: 4-6 (Normal), 34-36 (Challenge) |
||
| ⚫ | |||
|- |
|- |
||
! scope="col" style="text-align:center;" |Chapter |
! scope="col" style="text-align:center;" |Chapter |
||
| − | ! scope="col" style="text-align:center;" | |
+ | ! scope="col" style="text-align:center;" |Number of Rooms |
! scope="col" style="text-align:center;" |Dungeon |
! scope="col" style="text-align:center;" |Dungeon |
||
! style="text-align:center;" |Area Type |
! style="text-align:center;" |Area Type |
||
| Line 97: | Line 102: | ||
|1-1 |
|1-1 |
||
|3 |
|3 |
||
| − | | |
+ | |<span class="tip-tooltip" data-text="" data-heading="Voiceless Hunters" data-image="1-1.PNG|x25px">Voiceless Hunters</span> |
| − | | |
+ | | class="forest" |Forest |
| − | | |
+ | |{{Icon|Phemus}} |
|NA |
|NA |
||
|[[Chompy]] |
|[[Chompy]] |
||
| Line 106: | Line 111: | ||
|3 |
|3 |
||
|[[1-2 Tangle of Claws|Tangle of Claws]] |
|[[1-2 Tangle of Claws|Tangle of Claws]] |
||
| − | | |
+ | | class="forest" |Forest |
| − | | |
+ | |{{Icon|Willow Swift}} |
|NA |
|NA |
||
|[[JadeHowl]] |
|[[JadeHowl]] |
||
| Line 114: | Line 119: | ||
|3 |
|3 |
||
|[[1-3 Catacombs of Muck|Catacombs of Muck]] |
|[[1-3 Catacombs of Muck|Catacombs of Muck]] |
||
| − | | |
+ | | class="crypt" |Crypt |
| + | |{{Icon|Yasmin Bloom}} (Normal), {{Icon|Balog the Loud}} (Challenge) |
||
| − | |[[Yasmin Bloom]] |
||
|NA |
|NA |
||
|[[Prunefingerz]] |
|[[Prunefingerz]] |
||
| Line 122: | Line 127: | ||
|3 |
|3 |
||
|[[1-4 Feral Alliance|Feral Alliance]] |
|[[1-4 Feral Alliance|Feral Alliance]] |
||
| − | | |
+ | | class="forest" |Forest |
| − | | |
+ | |{{Icon|Jabber Clenchjaw}} |
|NA |
|NA |
||
|[[Buttons]], [[Kaptin Toecrusha]] |
|[[Buttons]], [[Kaptin Toecrusha]] |
||
| Line 130: | Line 135: | ||
|4 |
|4 |
||
|[[1-5 Bramblelurk Trail|Bramblelurk Trail]] |
|[[1-5 Bramblelurk Trail|Bramblelurk Trail]] |
||
| − | | |
+ | | class="forest" |Forest |
| − | | |
+ | |{{Icon|Tsume}} |
|NA |
|NA |
||
|[[Bahdizzle Shambottom]] |
|[[Bahdizzle Shambottom]] |
||
| Line 138: | Line 143: | ||
|4 |
|4 |
||
|[[1-6 Bramblelurk Keep|Bramblelurk Keep]] |
|[[1-6 Bramblelurk Keep|Bramblelurk Keep]] |
||
| − | | |
+ | | class="crypt" |Crypt |
| + | |{{Icon|Shadowblade}} (Normal), {{Icon|Alexandros}} (Challenge) |
||
| − | |[[Shadowblade]] |
||
|NA |
|NA |
||
|[[Chief JubJub]] |
|[[Chief JubJub]] |
||
|} |
|} |
||
| + | === Chapter 2 (The Cursed Lands) === |
||
| ⚫ | |||
| + | Recommended level range: 6-8 (Normal), 36-38 (Challenge) |
||
| − | Level range: 6 to 8 |
||
| − | {| class="article-table article-table-selected" style="margin: 0px auto; width: 100%;text-align:center;" |
+ | {| class="article-table article-table-selected" style="margin: 0px auto; width: 100%;text-align:center;" cellspacing="1" cellpadding="1" border="0" |
|- |
|- |
||
! scope="col" style="text-align:center;" |Chapter |
! scope="col" style="text-align:center;" |Chapter |
||
| − | ! scope="col" style="text-align:center;" | |
+ | ! scope="col" style="text-align:center;" |Number of Rooms |
! scope="col" style="text-align:center;" |Dungeon |
! scope="col" style="text-align:center;" |Dungeon |
||
! style="text-align:center;" |Area Type |
! style="text-align:center;" |Area Type |
||
| Line 184: | Line 189: | ||
|Scorched Homestead |
|Scorched Homestead |
||
| style=" color:rgb(250,50,0);" |Lava Cave |
| style=" color:rgb(250,50,0);" |Lava Cave |
||
| + | |[[Torchy]] (Normal), [[Overlord Executum]] (Challenge) |
||
| − | |[[Torchy]] |
||
|NA |
|NA |
||
|[[Derrick the Forsaken]], [[Aldar the Mad]] |
|[[Derrick the Forsaken]], [[Aldar the Mad]] |
||
| Line 216: | Line 221: | ||
|Throne of Ash |
|Throne of Ash |
||
| style=" color:rgb(250,50,0);" |Lava Cave |
| style=" color:rgb(250,50,0);" |Lava Cave |
||
| − | |[[Life Reaper Brom]] |
+ | |[[Life Reaper Brom]] (Normal), [[Pignius Maximus]] (Challenge) |
|NA |
|NA |
||
|[[General Eclipse]] |
|[[General Eclipse]] |
||
|} |
|} |
||
| + | === Chapter 3 (Dwarven Kingdom) === |
||
| − | === [[File:Normal Mode Icon.png|40x30px|link=#Modes]] Chapter 3 === |
||
| + | Recommended level range: 8-9 (Normal), 38-39 (Challenge) |
||
| − | Level range: 8 to 9 |
||
| − | {| class="article-table article-table-selected" style="margin: 0px auto; width: 100%;text-align:center;" |
+ | {| class="article-table article-table-selected" style="margin: 0px auto; width: 100%;text-align:center;" cellspacing="1" cellpadding="1" border="0" |
|- |
|- |
||
! scope="col" style="text-align:center;" |Chapter |
! scope="col" style="text-align:center;" |Chapter |
||
| − | ! scope="col" style="text-align:center;" | |
+ | ! scope="col" style="text-align:center;" |Number of Rooms |
! scope="col" style="text-align:center;" |Dungeon |
! scope="col" style="text-align:center;" |Dungeon |
||
! style="text-align:center;" |Area Type |
! style="text-align:center;" |Area Type |
||
| Line 236: | Line 241: | ||
|4 |
|4 |
||
|Frostridge Pass |
|Frostridge Pass |
||
| − | | |
+ | | class="icecave" |Ice Cave |
| − | | |
+ | |{{Icon|Stone Fist}} |
|NA |
|NA |
||
| − | |Bonepile Giant |
+ | |Bonepile Giant x3 |
|- |
|- |
||
|3-2 |
|3-2 |
||
|4 |
|4 |
||
|Permafrost Mines |
|Permafrost Mines |
||
| − | | |
+ | | class="icecave" |Ice Cave |
| − | | |
+ | |{{Icon|Sir William}} |
|NA |
|NA |
||
|Norgen Hillwatch |
|Norgen Hillwatch |
||
| Line 252: | Line 257: | ||
|4 |
|4 |
||
|Bonechilled Quarry |
|Bonechilled Quarry |
||
| − | | |
+ | | class="icecave" |Ice Cave |
| + | |{{Icon|Ekko}} (Normal), {{Icon|Samurai Takumi}} (Challenge) |
||
| − | |[[Ekko]] |
||
|NA |
|NA |
||
|Morogar Championfoot |
|Morogar Championfoot |
||
| Line 260: | Line 265: | ||
|3 |
|3 |
||
|The Runeforge |
|The Runeforge |
||
| − | | |
+ | | class="lavacave" |Lava Cave |
| − | | |
+ | |{{Icon|Mangle Jaw}} |
|NA |
|NA |
||
|Tiny |
|Tiny |
||
| Line 268: | Line 273: | ||
|6 |
|6 |
||
|Stonehelm Citadel |
|Stonehelm Citadel |
||
| − | | |
+ | | class="crypt" |Crypt |
| + | |{{Icon|Yokozuna}} (Normal), {{Icon|Sifu Jianzhi}} (Challenge) |
||
| − | |[[Yokozuna]] |
||
|NA |
|NA |
||
|Rukas Grimbelly |
|Rukas Grimbelly |
||
|} |
|} |
||
| + | === Chapter 4 (Core of the World) === |
||
| − | === [[File:Normal Mode Icon.png|40x30px|link=#Modes]] Chapter 4 === |
||
| − | Level range: 10 |
+ | Level range: 10-12 (Normal), 40-42 (Challenge) |
| − | {| class="article-table article-table-selected" style="margin: 0px auto; width: 100%;text-align:center;" |
+ | {| class="article-table article-table-selected" style="margin: 0px auto; width: 100%;text-align:center;" cellspacing="1" cellpadding="1" border="0" |
|- |
|- |
||
! scope="col" style="text-align:center;" |Chapter |
! scope="col" style="text-align:center;" |Chapter |
||
| − | ! scope="col" style="text-align:center;" | |
+ | ! scope="col" style="text-align:center;" |Number of Rooms |
! scope="col" style="text-align:center;" |Dungeon |
! scope="col" style="text-align:center;" |Dungeon |
||
! style="text-align:center;" |Area Type |
! style="text-align:center;" |Area Type |
||
| Line 316: | Line 321: | ||
|[[Phemus]] |
|[[Phemus]] |
||
|NA |
|NA |
||
| − | |Urg Underbite |
+ | |Urg Underbite, Grol Frostbite |
|- |
|- |
||
|4-5 |
|4-5 |
||
| Line 322: | Line 327: | ||
|Mercenary Fortress |
|Mercenary Fortress |
||
| style=" color:fuchsia;" |Crypt |
| style=" color:fuchsia;" |Crypt |
||
| − | |[[Rogar Stonecrusher]] |
+ | |[[Rogar Stonecrusher]] (Normal), [[Therand Fiddlestrom]] (Challenge) |
|NA |
|NA |
||
|General Raza |
|General Raza |
||
| Line 338: | Line 343: | ||
|Icy Hollow |
|Icy Hollow |
||
| style=" color:cyan;" |Ice Cave |
| style=" color:cyan;" |Ice Cave |
||
| − | |[[Black Diamond]] |
+ | |[[Black Diamond]] (Normal), [[Masuta Kira]] (Challenge) |
|NA |
|NA |
||
|Yirishi Reborn |
|Yirishi Reborn |
||
|} |
|} |
||
| + | === Chapter 5 (The Mystical Valley) === |
||
| − | === [[File:Normal Mode Icon.png|40x30px|link=#Modes]] Chapter 5 === |
||
| − | + | Recommended level range: 12-16 (Normal), 42-46 (Challenge) |
|
| − | {| class="article-table article-table-selected" style="margin: 0px auto; width: 100%;text-align:center;" |
+ | {| class="article-table article-table-selected" style="margin: 0px auto; width: 100%;text-align:center;" cellspacing="1" cellpadding="1" border="0" |
|- |
|- |
||
! scope="col" style="text-align:center;" |Chapter |
! scope="col" style="text-align:center;" |Chapter |
||
| − | ! scope="col" style="text-align:center;" | |
+ | ! scope="col" style="text-align:center;" |Number of Rooms |
! scope="col" style="text-align:center;" |Dungeon |
! scope="col" style="text-align:center;" |Dungeon |
||
! style="text-align:center;" |Area Type |
! style="text-align:center;" |Area Type |
||
| Line 391: | Line 396: | ||
|Shogunate Fortress |
|Shogunate Fortress |
||
| style=" color:fuchsia;" |Crypt |
| style=" color:fuchsia;" |Crypt |
||
| + | |[[Zurk]] (Normal), [[Overlord Executum]] (Challenge) |
||
| − | |[[Zurk]] |
||
|NA |
|NA |
||
|Amatsu Takeda |
|Amatsu Takeda |
||
| Line 424: | Line 429: | ||
| style="border-color:rgb(255,215,0); color:cyan;" |Ice Cave |
| style="border-color:rgb(255,215,0); color:cyan;" |Ice Cave |
||
| style="border-color:rgb(255,215,0);" |[[Torchy]] |
| style="border-color:rgb(255,215,0);" |[[Torchy]] |
||
| − | | style="border-color:rgb(255,215,0);" |[[ |
+ | | style="border-color:rgb(255,215,0);" |[[Brawny Evo]] |
| style="border-color:rgb(255,215,0);" |Frost Titan, Pinesap Titan |
| style="border-color:rgb(255,215,0);" |Frost Titan, Pinesap Titan |
||
|- |
|- |
||
| Line 431: | Line 436: | ||
| style="border-color:rgb(255,215,0);" |[[File:Epic Skull.png|25px]] Reflection Halls |
| style="border-color:rgb(255,215,0);" |[[File:Epic Skull.png|25px]] Reflection Halls |
||
| style="border-color:rgb(255,215,0); color:cyan;" |Ice Cave |
| style="border-color:rgb(255,215,0); color:cyan;" |Ice Cave |
||
| − | | style="border-color:rgb(255,215,0);" |[[Phenol Thoxian]] |
+ | | style="border-color:rgb(255,215,0);" |[[Phenol Thoxian]] (Normal), [[Icebloom]] (Challenge) |
| style="border-color:rgb(255,215,0);" |NA |
| style="border-color:rgb(255,215,0);" |NA |
||
| style="border-color:rgb(255,215,0);" |[[Kang-Kung]] |
| style="border-color:rgb(255,215,0);" |[[Kang-Kung]] |
||
|} |
|} |
||
| + | === Chapter 6 (Defiled Woodland) === |
||
| − | === [[File:Normal Mode Icon.png|40x30px|link=#Modes]] Chapter 6 === |
||
| − | + | Recommended level range: 18-19 (Normal), 48-49 (Challenge) |
|
| − | {| class="article-table article-table-selected" style="margin: 0px auto; width: 100%;text-align:center;" |
+ | {| class="article-table article-table-selected" style="margin: 0px auto; width: 100%;text-align:center;" cellspacing="1" cellpadding="1" border="0" |
|- |
|- |
||
! scope="col" style="text-align:center;" |Chapter |
! scope="col" style="text-align:center;" |Chapter |
||
| − | ! scope="col" style="text-align:center;" | |
+ | ! scope="col" style="text-align:center;" |Number of Rooms |
! scope="col" style="text-align:center;" |Dungeon |
! scope="col" style="text-align:center;" |Dungeon |
||
! style="text-align:center;" |Area Type |
! style="text-align:center;" |Area Type |
||
| Line 454: | Line 459: | ||
|[[Kobal the Pestilent]] |
|[[Kobal the Pestilent]] |
||
|NA |
|NA |
||
| + | |Uno Hexium |
||
| − | |[[File:Uno_Hexium_Icon.png|thumb|left|54px]]Uno Hexium |
||
|- |
|- |
||
|6-2 |
|6-2 |
||
| Line 462: | Line 467: | ||
|[[Squinch]] |
|[[Squinch]] |
||
|NA |
|NA |
||
| − | | |
+ | |Lord Barthus |
|- |
|- |
||
|6-3 |
|6-3 |
||
| Line 468: | Line 473: | ||
|Fire Rot |
|Fire Rot |
||
| style=" color:rgb(250,50,0);" |Lava Cave |
| style=" color:rgb(250,50,0);" |Lava Cave |
||
| − | |[[Mangle Jaw]] |
+ | |[[Mangle Jaw]] (Normal), [[Therand Fiddlestrom]] (Challenge) |
|[[Jewelled Evo]] |
|[[Jewelled Evo]] |
||
| + | |Lord Devoros, |
||
| − | |[[File:Lord_Devoros_Icon.png|left|54px]][[File:Quaestor_Lucius_Icon.png|left|54px]]Lord Devoros |
||
| ⚫ | |||
| − | and |
||
| − | |||
| ⚫ | |||
|- |
|- |
||
|6-4 |
|6-4 |
||
| Line 482: | Line 485: | ||
|[[Selwyn the Enduring]] |
|[[Selwyn the Enduring]] |
||
|NA |
|NA |
||
| − | | |
+ | |Scarlet Bloodborne, Jade Envilyn |
| − | |||
| − | [[File:Jade_Envilyn_Icon.png|left|54px]] |
||
| − | and |
||
| − | |||
| − | Jade Envilyn |
||
|- |
|- |
||
|6-5 |
|6-5 |
||
| Line 495: | Line 493: | ||
|[[Ekko]] |
|[[Ekko]] |
||
|NA |
|NA |
||
| − | | |
+ | |Gagos the Traitor King |
|- |
|- |
||
|6-6 |
|6-6 |
||
| Line 503: | Line 501: | ||
|[[Yokozuna]] |
|[[Yokozuna]] |
||
|NA |
|NA |
||
| + | |Ferryman |
||
| − | |[[File:Ferryman_Icon.png|left|54px]]Ferryman |
||
|} |
|} |
||
| + | === Chapter 7 (Crusaders' Vanguard) === |
||
| − | === [[File:Normal Mode Icon.png|40x30px|link=#Modes]] Chapter 7 === |
||
| − | + | Recommended level range: 20-21 (Normal), 50-51 (Challenge) |
|
| − | {| class="article-table article-table-selected" style="margin: 0px auto; width: 100%;text-align:center;" |
+ | {| class="article-table article-table-selected" style="margin: 0px auto; width: 100%;text-align:center;" cellspacing="1" cellpadding="1" border="0" |
|- |
|- |
||
! scope="col" style="text-align:center;" |Chapter |
! scope="col" style="text-align:center;" |Chapter |
||
| − | ! scope="col" style="text-align:center;" | |
+ | ! scope="col" style="text-align:center;" |Number of Rooms |
! scope="col" style="text-align:center;" |Dungeon |
! scope="col" style="text-align:center;" |Dungeon |
||
! style="text-align:center;" |Area Type |
! style="text-align:center;" |Area Type |
||
| Line 522: | Line 520: | ||
|Noble Village |
|Noble Village |
||
| style=" color:lime;" |Forest |
| style=" color:lime;" |Forest |
||
| − | |[[Abigail the Brutal]] |
+ | |[[Abigail the Brutal]] |
|[[Earth Sisters Evo]] |
|[[Earth Sisters Evo]] |
||
| − | | |
+ | |Duchess Terra |
|- |
|- |
||
|7-2 |
|7-2 |
||
| Line 530: | Line 528: | ||
|The Farm Lands |
|The Farm Lands |
||
| style=" color:lime;" |Forest |
| style=" color:lime;" |Forest |
||
| − | |[[Willow Swift]] |
+ | |[[Willow Swift]] (Normal), [[Dagrund Blacksmoke]] (Challenge) |
|[[Spirit Evo]] |
|[[Spirit Evo]] |
||
| − | | |
+ | |Chi the Light Spirit |
|- |
|- |
||
|7-3 |
|7-3 |
||
| Line 540: | Line 538: | ||
|[[Zurk]] |
|[[Zurk]] |
||
|[[Valkyrie Evo]] |
|[[Valkyrie Evo]] |
||
| + | |Sir Adam, |
||
| − | |[[File:Sir_Adam_Icon.png|none|54px]] Sir Adam and [[File:Rose_Devereux_Icon.png|none|54px]] Rose Devereux |
||
| + | Rose Devereux |
||
|- |
|- |
||
|7-4 |
|7-4 |
||
| Line 548: | Line 547: | ||
|[[Jabber Clenchjaw]] |
|[[Jabber Clenchjaw]] |
||
|[[Stormwind Evo]] |
|[[Stormwind Evo]] |
||
| − | | |
+ | |Leoric the Brave |
|- |
|- |
||
|7-5 |
|7-5 |
||
| Line 556: | Line 555: | ||
|[[Ignus the Mad]] |
|[[Ignus the Mad]] |
||
|[[Spirit Evo]] |
|[[Spirit Evo]] |
||
| − | | |
+ | |The Archangel |
|} |
|} |
||
| + | === Chapter 8 (The Warmachine) === |
||
| − | === [[File:Normal Mode Icon.png|40x30px|link=#Modes]] Chapter 8 === |
||
| + | Recommended level range: 21-24 (Normal), 51-54 (Challenge)<br> |
||
| − | Level range: 21 to 24 |
||
| + | Quest Rewards: 8x {{Icon|Lady Nimriel}}, [[File:Gold.png|x25px]] 80,000 gold |
||
| − | {| class="article-table article-table-selected" style="margin: 0px auto; width: 100%;text-align:center;" |
+ | {| class="article-table article-table-selected" style="margin: 0px auto; width: 100%;text-align:center;" cellspacing="1" cellpadding="1" border="0" |
|- |
|- |
||
! scope="col" style="text-align:center;" |Chapter |
! scope="col" style="text-align:center;" |Chapter |
||
| − | ! scope="col" style="text-align:center;" | |
+ | ! scope="col" style="text-align:center;" |Number of Rooms |
! scope="col" style="text-align:center;" |Dungeon |
! scope="col" style="text-align:center;" |Dungeon |
||
! style="text-align:center;" |Area Type |
! style="text-align:center;" |Area Type |
||
| Line 577: | Line 577: | ||
|[[Rogar Stonecrusher]] |
|[[Rogar Stonecrusher]] |
||
|NA |
|NA |
||
| − | |[[Rognog Blisterbut]] |
+ | |[[Rognog Blisterbut|Rognog Blisterbut]] |
|- |
|- |
||
|8-2 |
|8-2 |
||
| Line 591: | Line 591: | ||
|The Second Wave |
|The Second Wave |
||
| style=" color:rgb(250,50,0);" |Lava Cave |
| style=" color:rgb(250,50,0);" |Lava Cave |
||
| − | |[[Stone Fist]] |
+ | |[[Stone Fist]] (Normal), [[Samurai Takumi]] (Challenge) |
|NA |
|NA |
||
|[[Nalthune]], [[Major Bradox]] |
|[[Nalthune]], [[Major Bradox]] |
||
| Line 623: | Line 623: | ||
|Hope's End |
|Hope's End |
||
| style=" color:rgb(250,50,0);" |Lava Cave |
| style=" color:rgb(250,50,0);" |Lava Cave |
||
| − | |[[Phemus]] |
+ | |[[Phemus]] (Normal), [[Indigo]] (Challenge) |
|NA |
|NA |
||
| − | |[[ |
+ | |[[World Eater Tharox]], [[Major Bradox]] |
|} |
|} |
||
| + | === Chapter 9 (Unholy Kingdom) === |
||
| − | === [[File:Normal Mode Icon.png|40x30px|link=#Modes]] Chapter 9 === |
||
| + | Recommended level range: 24-26 (Normal), 54-56 (Challenge)<br> |
||
| − | Level range: 24 to 26 |
||
| + | Quest Rewards: 8x {{Icon|Lady Nimriel}}, [[File:Gold.png|x25px]] 90,000 gold |
||
| − | {| class="article-table article-table-selected" style="margin: 0px auto; width: 100%;text-align:center;" |
+ | {| class="article-table article-table-selected" style="margin: 0px auto; width: 100%;text-align:center;" cellspacing="1" cellpadding="1" border="0" |
|- |
|- |
||
! scope="col" style="text-align:center;" |Chapter |
! scope="col" style="text-align:center;" |Chapter |
||
| − | ! scope="col" style="text-align:center;" | |
+ | ! scope="col" style="text-align:center;" |Number of Rooms |
! scope="col" style="text-align:center;" |Dungeon |
! scope="col" style="text-align:center;" |Dungeon |
||
! style="text-align:center;" |Area Type |
! style="text-align:center;" |Area Type |
||
| Line 660: | Line 661: | ||
|The Black Fortress |
|The Black Fortress |
||
| style=" color:fuchsia;" |Crypt |
| style=" color:fuchsia;" |Crypt |
||
| − | |[[Torchy]] |
+ | |[[Torchy]] (Normal), [[Balog the Loud]] (Challenge) |
|[[Valkyrie Evo]] |
|[[Valkyrie Evo]] |
||
|[[Chaos Lord Victus]] |
|[[Chaos Lord Victus]] |
||
| Line 676: | Line 677: | ||
|Unholy Capitol |
|Unholy Capitol |
||
| style=" color:fuchsia;" |Crypt |
| style=" color:fuchsia;" |Crypt |
||
| − | |[[Shadowblade]] |
+ | |[[Shadowblade]] (Normal), [[Julius]] (Challenge) |
|[[Earth Sisters Evo]] |
|[[Earth Sisters Evo]] |
||
|[[Overlord Absalom]] |
|[[Overlord Absalom]] |
||
|} |
|} |
||
| + | === Chapter 10 (Infernal Barrens) === |
||
| − | === [[File:Normal Mode Icon.png|40x30px|link=#Modes]] Chapter 10 === |
||
| + | Recommended level range: 26-28 (Normal), 56-58 (Challenge)<br> |
||
| − | Level range: 26 to 28 |
||
| + | Quest Rewards: 8x {{Icon|Lady Nimriel}}, [[File:Gold.png|x25px]] 100,000 gold |
||
| − | {| class="article-table article-table-selected" style="margin: 0px auto; width: 100%;text-align:center;" |
+ | {| class="article-table article-table-selected" style="margin: 0px auto; width: 100%;text-align:center;" cellspacing="1" cellpadding="1" border="0" |
|- |
|- |
||
! scope="col" style="text-align:center;" |Chapter |
! scope="col" style="text-align:center;" |Chapter |
||
| − | ! scope="col" style="text-align:center;" | |
+ | ! scope="col" style="text-align:center;" |Number of Rooms |
! scope="col" style="text-align:center;" |Dungeon |
! scope="col" style="text-align:center;" |Dungeon |
||
! style="text-align:center;" |Area Type |
! style="text-align:center;" |Area Type |
||
| Line 713: | Line 715: | ||
|Demon's Breath |
|Demon's Breath |
||
| style=" color:rgb(250,50,0);" |Lava Cave |
| style=" color:rgb(250,50,0);" |Lava Cave |
||
| − | |[[Mangle Jaw]] |
+ | |[[Mangle Jaw]] (Normal), [[Augustus]] (Challenge) |
|NA |
|NA |
||
| − | |Carnage |
+ | |Carnage, Eragos (Challenge Mode only) |
|- |
|- |
||
|10-4 |
|10-4 |
||
| Line 734: | Line 736: | ||
|} |
|} |
||
| − | === |
+ | === Chapter 11 (Necropolis) === |
| − | + | Recommended level range: 28-32 (Normal), 58-62 (Challenge) |
|
| − | {| class="article-table article-table-selected" style="margin: 0px auto; width: 100%;text-align:center;" |
+ | {| class="article-table article-table-selected" style="margin: 0px auto; width: 100%;text-align:center;" cellspacing="1" cellpadding="1" border="0" |
|- |
|- |
||
! scope="col" style="text-align:center;" |Chapter |
! scope="col" style="text-align:center;" |Chapter |
||
| − | ! scope="col" style="text-align:center;" | |
+ | ! scope="col" style="text-align:center;" |Number of Rooms |
! scope="col" style="text-align:center;" |Dungeon |
! scope="col" style="text-align:center;" |Dungeon |
||
! style="text-align:center;" |Area Type |
! style="text-align:center;" |Area Type |
||
| Line 756: | Line 758: | ||
|11-2 |
|11-2 |
||
|4 |
|4 |
||
| − | | |
+ | |Traitors Retreat |
| style=" color:cyan;" |Ice Cave |
| style=" color:cyan;" |Ice Cave |
||
|[[Yasmin Bloom]] |
|[[Yasmin Bloom]] |
||
| Line 774: | Line 776: | ||
|Summit of Power |
|Summit of Power |
||
| style=" color:fuchsia;" |Crypt |
| style=" color:fuchsia;" |Crypt |
||
| − | |[[Abigail the Brutal]] |
+ | |[[Abigail the Brutal]] (Normal), [[Malice]] (Challenge) |
|[[Moonlight Evo]] |
|[[Moonlight Evo]] |
||
|Utica the Forgotten |
|Utica the Forgotten |
||
| Line 784: | Line 786: | ||
|[[Phemus]] |
|[[Phemus]] |
||
|[[Incendiary Evo]] |
|[[Incendiary Evo]] |
||
| − | |Mutters |
+ | |Mutters, Howling Mad Jibbers |
|- |
|- |
||
| style="border-color:rgb(255,215,0);" |11-6 |
| style="border-color:rgb(255,215,0);" |11-6 |
||
| Line 800: | Line 802: | ||
| style="border-color:rgb(255,215,0);" |[[Life Reaper Brom]] |
| style="border-color:rgb(255,215,0);" |[[Life Reaper Brom]] |
||
| style="border-color:rgb(255,215,0);" |[[Crypt Evo]] |
| style="border-color:rgb(255,215,0);" |[[Crypt Evo]] |
||
| − | | style="border-color:rgb(255,215,0);" |[[Lich]] |
+ | | style="border-color:rgb(255,215,0);" |Carnage, Knight Creeper Immortal, [[Lich]] |
|} |
|} |
||
| + | === Chapter 12 (Imperial Border) === |
||
| − | === [[File:Normal Mode Icon.png|40x30px|link=#Modes]] Chapter 12 === |
||
| − | + | Recommended level range: 32-33 (Normal), 62-63 (Challenge) |
|
| − | {| class="article-table article-table-selected" style="margin: 0px auto; width: 100%;text-align:center;" |
+ | {| class="article-table article-table-selected" style="margin: 0px auto; width: 100%;text-align:center;" cellspacing="1" cellpadding="1" border="0" |
|- |
|- |
||
! scope="col" style="text-align:center;" |Chapter |
! scope="col" style="text-align:center;" |Chapter |
||
| − | ! scope="col" style="text-align:center;" | |
+ | ! scope="col" style="text-align:center;" |Number of Rooms |
! scope="col" style="text-align:center;" |Dungeon |
! scope="col" style="text-align:center;" |Dungeon |
||
! style="text-align:center;" |Area Type |
! style="text-align:center;" |Area Type |
||
| Line 829: | Line 831: | ||
|[[Jabber Clenchjaw]] |
|[[Jabber Clenchjaw]] |
||
|NA |
|NA |
||
| − | |Rabid Manhunter |
+ | |Rabid Manhunter x2 |
|- |
|- |
||
|12-3 |
|12-3 |
||
| Line 835: | Line 837: | ||
|Past the Wall |
|Past the Wall |
||
| style=" color:lime;" |Forest |
| style=" color:lime;" |Forest |
||
| − | |[[Selwyn the Enduring]] |
+ | |[[Selwyn the Enduring]] (Normal), [[Samurai Takumi]] (Challenge) |
|[[Subterranean Evo]] |
|[[Subterranean Evo]] |
||
|Archmage Lumos |
|Archmage Lumos |
||
| Line 859: | Line 861: | ||
|The Arena |
|The Arena |
||
| style=" color:fuchsia;" |Crypt |
| style=" color:fuchsia;" |Crypt |
||
| − | |[[Black Diamond]] |
+ | |[[Black Diamond]] (Normal), [[Indigo]] (Challenge) |
|NA |
|NA |
||
| − | |Tank the Arena Champ |
+ | |Tank the Arena Champ, Seaspray Busho (Challenge Mode only) |
|} |
|} |
||
| + | === Chapter 13 (The Imperial Quarry) === |
||
| − | === [[File:Normal Mode Icon.png|40x30px|link=#Modes]] Chapter 13 === |
||
| − | + | Recommended level range: 34-35 (Normal), 64-65 (Challenge) |
|
| − | {| class="article-table article-table-selected" style="margin: 0px auto; width: 100%;text-align:center;" |
+ | {| class="article-table article-table-selected" style="margin: 0px auto; width: 100%;text-align:center;" cellspacing="1" cellpadding="1" border="0" |
|- |
|- |
||
! scope="col" style="text-align:center;" |Chapter |
! scope="col" style="text-align:center;" |Chapter |
||
| − | ! scope="col" style="text-align:center;" | |
+ | ! scope="col" style="text-align:center;" |Number of Rooms |
! scope="col" style="text-align:center;" |Dungeon |
! scope="col" style="text-align:center;" |Dungeon |
||
! style="text-align:center;" |Area Type |
! style="text-align:center;" |Area Type |
||
| Line 888: | Line 890: | ||
|The Furnace |
|The Furnace |
||
| style=" color:rgb(250,50,0);" |Lava Cave |
| style=" color:rgb(250,50,0);" |Lava Cave |
||
| − | |[[Nitpick]] |
+ | |[[Nitpick]] (Normal), [[Icepick]] (Challenge) |
|NA |
|NA |
||
|Iron Smith Brutus |
|Iron Smith Brutus |
||
| Line 904: | Line 906: | ||
|The Abyss |
|The Abyss |
||
| style=" color:rgb(250,50,0);" |Lava Cave |
| style=" color:rgb(250,50,0);" |Lava Cave |
||
| − | |[[Chief NubNub]] |
+ | |[[Chief NubNub]] (Normal), [[Alexandros]] (Challenge) |
|NA |
|NA |
||
|Aedric |
|Aedric |
||
|} |
|} |
||
| + | === Chapter 14 (Crimson Empire) === |
||
| − | === [[File:Normal Mode Icon.png|40x30px|link=#Modes]] Chapter 14 === |
||
| − | + | Recommended level range: 35-38 (Normal), 65-68 (Challenge) |
|
| − | {| class="article-table article-table-selected" style="margin: 0px auto; width: 100%;text-align:center;" |
+ | {| class="article-table article-table-selected" style="margin: 0px auto; width: 100%;text-align:center;" cellspacing="1" cellpadding="1" border="0" |
|- |
|- |
||
! scope="col" style="text-align:center;" |Chapter |
! scope="col" style="text-align:center;" |Chapter |
||
| − | ! scope="col" style="text-align:center;" | |
+ | ! scope="col" style="text-align:center;" |Number of Rooms |
! scope="col" style="text-align:center;" |Dungeon |
! scope="col" style="text-align:center;" |Dungeon |
||
! style="text-align:center;" |Area Type |
! style="text-align:center;" |Area Type |
||
| Line 927: | Line 929: | ||
|[[Zurk]] |
|[[Zurk]] |
||
|NA |
|NA |
||
| − | |High Priestess |
+ | |High Priestess Flora |
|- |
|- |
||
|14-2 |
|14-2 |
||
| Line 935: | Line 937: | ||
|[[Squinch]] |
|[[Squinch]] |
||
|[[Astral Evo]] |
|[[Astral Evo]] |
||
| − | |Tai Mei |
+ | |Tai Mei Senpai |
|- |
|- |
||
|14-3 |
|14-3 |
||
| Line 949: | Line 951: | ||
|Raiders Camp |
|Raiders Camp |
||
| style=" color:green;" |Dark Forest |
| style=" color:green;" |Dark Forest |
||
| − | |[[Mangle Jaw]] |
+ | |[[Mangle Jaw]] (Normal), [[Pignius Maximus]] (Challenge) |
|NA |
|NA |
||
|Cobalt Ten |
|Cobalt Ten |
||
| Line 975: | Line 977: | ||
|[[Willow Swift]] |
|[[Willow Swift]] |
||
|[[Mind's Eye Evo]] |
|[[Mind's Eye Evo]] |
||
| + | |Nori Kanshu, Hattori Ono |
||
| − | |Hattori Ono, Nori Kanshu |
||
|- |
|- |
||
|14-8 |
|14-8 |
||
| Line 981: | Line 983: | ||
|Emperor's Palace |
|Emperor's Palace |
||
| style=" color:fuchsia;" |Crypt |
| style=" color:fuchsia;" |Crypt |
||
| − | |[[Tsume]] |
+ | |[[Tsume]] (Normal), [[Sifu Jianzhi]] (Challenge) |
|[[Diamond Evo]] |
|[[Diamond Evo]] |
||
|Emperor Tao |
|Emperor Tao |
||
|} |
|} |
||
| − | === |
+ | === Chapter 15 (Doomed Wastes)=== |
| − | + | Recommended level range: 38-40 (Normal), 68-70 (Challenge) |
|
| − | {| class="article-table article-table-selected" style="margin: 0px auto; width: 100%;text-align:center;" |
+ | {| class="article-table article-table-selected" style="margin: 0px auto; width: 100%;text-align:center;" cellspacing="1" cellpadding="1" border="0" |
|- |
|- |
||
! scope="col" style="text-align:center;" |Chapter |
! scope="col" style="text-align:center;" |Chapter |
||
| − | ! scope="col" style="text-align:center;" | |
+ | ! scope="col" style="text-align:center;" |Number of Rooms |
! scope="col" style="text-align:center;" |Dungeon |
! scope="col" style="text-align:center;" |Dungeon |
||
! style="text-align:center;" |Area Type |
! style="text-align:center;" |Area Type |
||
| Line 1,004: | Line 1,006: | ||
|[[Phemus]] |
|[[Phemus]] |
||
|NA |
|NA |
||
| − | |Ninshi Otsuka |
+ | |Ninshi Otsuka, Fallen Emperor |
|- |
|- |
||
|15-2 |
|15-2 |
||
| Line 1,026: | Line 1,028: | ||
|Demon's Den |
|Demon's Den |
||
| style=" color:rgb(250,50,0);" |Lava Cave |
| style=" color:rgb(250,50,0);" |Lava Cave |
||
| − | |[[Kobal the Pestilent]] |
+ | |[[Kobal the Pestilent]] (Normal), [[Viperia]] (Challenge) |
|[[Runed Evo]] |
|[[Runed Evo]] |
||
|Aedric |
|Aedric |
||
| Line 1,055: | Line 1,057: | ||
|} |
|} |
||
| + | === Chapter 16 (Dragon Lord Summit) === |
||
| − | === [[File:Normal Mode Icon.png|40x30px|link=#Modes]] Chapter 16 === |
||
| − | + | Recommended level range: 40-46 (Normal), 70-72 (Challenge) |
|
| − | {| class="article-table article-table-selected" style="margin: 0px auto; width: 100%;text-align:center;" |
+ | {| class="article-table article-table-selected" style="margin: 0px auto; width: 100%;text-align:center;" cellspacing="1" cellpadding="1" border="0" |
|- |
|- |
||
! scope="col" style="text-align:center;" |Chapter |
! scope="col" style="text-align:center;" |Chapter |
||
| − | ! scope="col" style="text-align:center;" | |
+ | ! scope="col" style="text-align:center;" |Number of Rooms |
! scope="col" style="text-align:center;" |Dungeon |
! scope="col" style="text-align:center;" |Dungeon |
||
! style="text-align:center;" |Area Type |
! style="text-align:center;" |Area Type |
||
| Line 1,097: | Line 1,099: | ||
|[[Sir William]] |
|[[Sir William]] |
||
|[[Mind's Eye Evo]] |
|[[Mind's Eye Evo]] |
||
| − | |Ash the Inferno |
+ | |Ash the Inferno, Ferro the Blizzard |
|- |
|- |
||
|16-5 |
|16-5 |
||
| Line 1,103: | Line 1,105: | ||
|[[16-5 Temple Ruins|Temple Ruins]] |
|[[16-5 Temple Ruins|Temple Ruins]] |
||
| style=" color:fuchsia;" |Crypt |
| style=" color:fuchsia;" |Crypt |
||
| − | |[[Jabber Clenchjaw]] |
+ | |[[Jabber Clenchjaw]] (Normal), [[Cobressa]] (Challenge) |
|NA |
|NA |
||
|Asrogar the Ancient |
|Asrogar the Ancient |
||
| Line 1,143: | Line 1,145: | ||
| style="border-color:rgb(255,215,0);" |[[File:Epic Skull.png|25px]] [[16-10 Devourer of Flames|Devourer of Flames]] |
| style="border-color:rgb(255,215,0);" |[[File:Epic Skull.png|25px]] [[16-10 Devourer of Flames|Devourer of Flames]] |
||
| style="border-color:rgb(255,215,0); color:rgb(250,50,0);" |Lava Cave |
| style="border-color:rgb(255,215,0); color:rgb(250,50,0);" |Lava Cave |
||
| − | | style="border-color:rgb(255,215,0);" |[[Phenol Thoxian]] |
+ | | style="border-color:rgb(255,215,0);" |[[Phenol Thoxian]] (Normal), [[General Krexx]] (Challenge) |
| style="border-color:rgb(255,215,0);" |NA |
| style="border-color:rgb(255,215,0);" |NA |
||
| style="border-color:rgb(255,215,0);" |[[Sulfurious]] |
| style="border-color:rgb(255,215,0);" |[[Sulfurious]] |
||
|} |
|} |
||
| + | === Chapter 17 (Rune Stone Mountains) === |
||
| − | === [[File:Normal Mode Icon.png|40x30px|link=#Modes]] Chapter 17 === |
||
| − | + | Recommended level range: 46-48 (Normal), 72 (Challenge) |
|
Required Player Level: 38 |
Required Player Level: 38 |
||
| − | {| class="article-table article-table-selected" style="margin: 0px auto; width: 100%;text-align:center;" |
+ | {| class="article-table article-table-selected" style="margin: 0px auto; width: 100%;text-align:center;" cellspacing="1" cellpadding="1" border="0" |
|- |
|- |
||
! scope="col" style="text-align:center;" |Chapter |
! scope="col" style="text-align:center;" |Chapter |
||
| − | ! scope="col" style="text-align:center;" | |
+ | ! scope="col" style="text-align:center;" |Number of Rooms |
! scope="col" style="text-align:center;" |Dungeon |
! scope="col" style="text-align:center;" |Dungeon |
||
! style="text-align:center;" |Area Type |
! style="text-align:center;" |Area Type |
||
| Line 1,182: | Line 1,184: | ||
|Silent Caves |
|Silent Caves |
||
| style=" color:cyan;" |Ice Cave |
| style=" color:cyan;" |Ice Cave |
||
| + | |[[Tsume]] (Normal), [[Hansuke Undying]] (Challenge) |
||
| − | |[[Tsume]] |
||
|[[Coldfire Evo]] |
|[[Coldfire Evo]] |
||
|June Song |
|June Song |
||
| Line 1,198: | Line 1,200: | ||
|The Rune Temple |
|The Rune Temple |
||
| style=" color:rgb(255, 152, 51);" |Mountain |
| style=" color:rgb(255, 152, 51);" |Mountain |
||
| − | |[[Black Diamond]] |
+ | |[[Black Diamond]] (Normal), [[Bauble]] (Challenge) |
|[[Shadow Evo]] |
|[[Shadow Evo]] |
||
|Stone Master Kahal |
|Stone Master Kahal |
||
|} |
|} |
||
| + | === Chapter 18 (Land of Giants) === |
||
| − | === [[File:Normal Mode Icon.png|40x30px|link=#Modes]] Chapter 18 === |
||
| − | + | Recommended level range: 48-50 (Normal), 72 (Challenge) |
|
Required Player Level: 40 |
Required Player Level: 40 |
||
| − | {| class="article-table article-table-selected" style="margin: 0px auto; width: 100%;text-align:center;" |
+ | {| class="article-table article-table-selected" style="margin: 0px auto; width: 100%;text-align:center;" cellspacing="1" cellpadding="1" border="0" |
|- |
|- |
||
! scope="col" style="text-align:center;" |Chapter |
! scope="col" style="text-align:center;" |Chapter |
||
| − | ! scope="col" style="text-align:center;" | |
+ | ! scope="col" style="text-align:center;" |Number of Rooms |
! scope="col" style="text-align:center;" |Dungeon |
! scope="col" style="text-align:center;" |Dungeon |
||
! style="text-align:center;" |Area Type |
! style="text-align:center;" |Area Type |
||
| Line 1,223: | Line 1,225: | ||
|[[Squinch]] |
|[[Squinch]] |
||
|[[Infinity Evo]] |
|[[Infinity Evo]] |
||
| − | |Deimos |
+ | |Deimos, Erebus |
|- |
|- |
||
|18-2 |
|18-2 |
||
| Line 1,237: | Line 1,239: | ||
|Creon's Ice |
|Creon's Ice |
||
| style=" color:cyan;" |Ice Cave |
| style=" color:cyan;" |Ice Cave |
||
| − | |[[Selwyn the Enduring]] |
+ | |[[Selwyn the Enduring]] (Normal), [[Kai Makani]] (Challenge) |
|NA |
|NA |
||
|Hydro Osmium |
|Hydro Osmium |
||
| Line 1,253: | Line 1,255: | ||
|Creon's Home |
|Creon's Home |
||
| style=" color:fuchsia;" |Crypt |
| style=" color:fuchsia;" |Crypt |
||
| − | |[[Life Reaper Brom]] |
+ | |[[Life Reaper Brom]] (Normal), [[Lily Blossom]] (Challenge) |
|[[Runed Evo]] |
|[[Runed Evo]] |
||
|Creon |
|Creon |
||
|} |
|} |
||
| + | === Chapter 19 (The Mystical Highlands) === |
||
| − | === [[File:Normal Mode Icon.png|40x30px|link=#Modes]] Chapter 19 === |
||
| − | + | Recommended level range: 51-53 (Normal), 72 (Challenge) |
|
Required Player Level: 45 |
Required Player Level: 45 |
||
| − | {| class="article-table article-table-selected" style="margin: 0px auto; width: 100%;text-align:center;" |
+ | {| class="article-table article-table-selected" style="margin: 0px auto; width: 100%;text-align:center;" cellspacing="1" cellpadding="1" border="0" |
|- |
|- |
||
! scope="col" style="text-align:center;" |Chapter |
! scope="col" style="text-align:center;" |Chapter |
||
| − | ! scope="col" style="text-align:center;" | |
+ | ! scope="col" style="text-align:center;" |Number of Rooms |
! scope="col" style="text-align:center;" |Dungeon |
! scope="col" style="text-align:center;" |Dungeon |
||
! style="text-align:center;" |Area Type |
! style="text-align:center;" |Area Type |
||
| Line 1,278: | Line 1,280: | ||
|[[Torchy]] |
|[[Torchy]] |
||
|[[Shadow Evo]] |
|[[Shadow Evo]] |
||
| − | | |
+ | |Nasty Essence x2 |
|- |
|- |
||
|19-2 |
|19-2 |
||
| Line 1,286: | Line 1,288: | ||
|[[Chief NubNub]] |
|[[Chief NubNub]] |
||
|NA |
|NA |
||
| + | |Toxic Shiitake |
||
| − | |Shadow Wisp |
||
|- |
|- |
||
|19-3 |
|19-3 |
||
| Line 1,300: | Line 1,302: | ||
|Coarse Climb |
|Coarse Climb |
||
| style=" color:rgb(255, 152, 51);" |Mountain |
| style=" color:rgb(255, 152, 51);" |Mountain |
||
| − | |[[Nitpick]] |
+ | |[[Nitpick]] (Normal), [[Zen]] (Challenge) |
|NA |
|NA |
||
|Jade Demon Karu |
|Jade Demon Karu |
||
| Line 1,324: | Line 1,326: | ||
|Deadly Descent |
|Deadly Descent |
||
| style=" color:cyan;" |Ice Cave |
| style=" color:cyan;" |Ice Cave |
||
| − | |[[Stone Fist]] |
+ | |[[Stone Fist]] (Normal), [[Icepick]] (Challenge) |
|NA |
|NA |
||
|Asha Jakki |
|Asha Jakki |
||
|} |
|} |
||
| + | === Chapter 20 (The Pinnacle) === |
||
| − | === [[File:Normal Mode Icon.png|40x30px|link=#Modes]] Chapter 20 === |
||
| − | + | Recommended level range: 53-56 (Normal), 72 (Challenge) |
|
Required Player Level: 50 |
Required Player Level: 50 |
||
| − | {| class="article-table article-table-selected" style="margin: 0px auto; width: 100%;text-align:center;" |
+ | {| class="article-table article-table-selected" style="margin: 0px auto; width: 100%;text-align:center;" cellspacing="1" cellpadding="1" border="0" |
|- |
|- |
||
! scope="col" style="text-align:center;" |Chapter |
! scope="col" style="text-align:center;" |Chapter |
||
| − | ! scope="col" style="text-align:center;" | |
+ | ! scope="col" style="text-align:center;" |Number of Rooms |
! scope="col" style="text-align:center;" |Dungeon |
! scope="col" style="text-align:center;" |Dungeon |
||
! style="text-align:center;" |Area Type |
! style="text-align:center;" |Area Type |
||
| Line 1,371: | Line 1,373: | ||
|Sky Temple |
|Sky Temple |
||
| style=" color:rgb(255, 152, 51);" |Mountain |
| style=" color:rgb(255, 152, 51);" |Mountain |
||
| + | |[[Ekko]] (Normal), [[Archangel Emily]] (Challenge) |
||
| − | |[[Ekko]] |
||
|NA |
|NA |
||
|San Andria |
|San Andria |
||
| Line 1,403: | Line 1,405: | ||
|Pinnacle |
|Pinnacle |
||
| style=" color:rgb(255, 152, 51);" |Mountain |
| style=" color:rgb(255, 152, 51);" |Mountain |
||
| − | |[[Ignus the Mad]] |
+ | |[[Ignus the Mad]] (Normal), [[Pignius Maximus]] (Challenge) |
|NA |
|NA |
||
|Akriel, Aquarius |
|Akriel, Aquarius |
||
|} |
|} |
||
| + | === Chapter 21 (The Blight) === |
||
| − | === [[File:Normal Mode Icon.png|40x30px|link=#Modes]] Chapter 21 === |
||
| − | Level range: 57 |
+ | Level range: 57-61 (Normal), 72 (Challenge) |
| − | |||
Required Player Level: 55 |
Required Player Level: 55 |
||
| − | {| class="article-table article-table-selected" style="margin: 0px auto; width: 100%;text-align:center;" |
+ | {| class="article-table article-table-selected" style="margin: 0px auto; width: 100%;text-align:center;" cellspacing="1" cellpadding="1" border="0" |
|- |
|- |
||
! scope="col" style="text-align:center;" |Chapter |
! scope="col" style="text-align:center;" |Chapter |
||
| − | ! scope="col" style="text-align:center;" | |
+ | ! scope="col" style="text-align:center;" |Number of Rooms |
! scope="col" style="text-align:center;" |Dungeon |
! scope="col" style="text-align:center;" |Dungeon |
||
! style="text-align:center;" |Area Type |
! style="text-align:center;" |Area Type |
||
| Line 1,445: | Line 1,446: | ||
|[[Stone Fist]] |
|[[Stone Fist]] |
||
|NA |
|NA |
||
| − | | |
+ | |Lalonna Tyr |
|- |
|- |
||
|21-4 |
|21-4 |
||
| Line 1,457: | Line 1,458: | ||
|21-5 |
|21-5 |
||
|5 |
|5 |
||
| − | | |
+ | |Hero's End |
| style=" color:fuchsia;" |Crypt |
| style=" color:fuchsia;" |Crypt |
||
|[[Kobal the Pestilent]] |
|[[Kobal the Pestilent]] |
||
| Line 1,467: | Line 1,468: | ||
|Splinter Wood |
|Splinter Wood |
||
| style=" color:green;" |Dark Forest |
| style=" color:green;" |Dark Forest |
||
| − | |[[Yasmin Bloom]] |
+ | |[[Yasmin Bloom]] (Normal), [[Dhaegon Stonecrusher]] (Challenge) |
|NA |
|NA |
||
|Viska |
|Viska |
||
| Line 1,503: | Line 1,504: | ||
| style="border-color:rgb(255,215,0);" |[[Root of All Evil]] |
| style="border-color:rgb(255,215,0);" |[[Root of All Evil]] |
||
|} |
|} |
||
| − | |||
| ⚫ | |||
| ⚫ | [[ |
||
==Read more ...== |
==Read more ...== |
||
Revision as of 00:04, 23 February 2020
Basic Information
To earn Gold, Hammers, XP Potions, Evos, Runes and Materials, they must fight in Dungeons within the campaign map. Tapping the Campaign button will reveal a presented map in which there are several areas to choose from, each representing a Chapter. Each Chapter contains a list of Dungeons. Once a Dungeon is beaten the next Dungeon is unlocked. Completing the Chapter unlocks the next Chapter.
Most Dungeons require 5 Stamina to enter. However, the last Dungeon of every Chapter requires 7 Stamina.
For Island Dungeons other than Boss Island Dungeons: The first Dungeon requires no Stamina and 1 Loot Key to Quick Loot, the second one requires 5 Stamina and 2 Keys, the third requires 10 Stamina and 3 Keys, the fourth requires 15 Stamina and 4 Keys, and the last Dungeon requires a whopping 20 Stamina and 5 Keys.
Modes
The Campaign Dungeons (excluding Gold Island, XP Island, Evo Island and Boss Island) are available in three levels of difficulty:
 Normal mode: This mode is for level 1 to 60. It's described here.
 Challenge Mode: This mode unlocks at Player Level 30 and is for Heroes up to level 72. It offers Blessings of the Seeker, Leonidus tokens and other rare Hero Tokens.
- Boss Mode: Unlocked at Player Level 60, this is the place where you will find the hardest Dungeons with the most dangerous enemies and sweetest loot such as Epics (only found on Boss Island, unlocked at Player Level 50).
- Age of Chaos expansion: Unlocked at Player Level 70, you can find doom and chaos in these infected dungeons.
The Battle
In preparation for the Dungeon battle, up to four Heroes are chosen to fight through the Dungeon. In addition,up to three Potions are added to the bag to assist with the vigor of the battle. You can choose which potions to bring to the battle.
When the battle starts, there are two special icons located on the bottom of the screen. The sword icon on the right is an auto-attack button that forces all of your Heroes to perform their Basic Attack on all enemies (silver sword) or perform their special attacks (golden sword). The basic attack option should be used only if your Heroes are strong enough to defeat the enemies. The auto-attack mode is cancelled if one Hero has died or in low HP.
The second icon is a yellow button with a dark silhouette of a gladiator. It's located at the right end of the hero's special attack buttons. This icon allows the player to summon a Friend's Champion for help from their Friend List. That friend's featured hero (choosable) will perform their 1st special attack.
Occasionally, the player will encounter a Treasure Room within a Dungeon. The player has the option to choose one of the three chests provided, which is added to their rewards at the end of a successful completion of the Dungeon. One of the three chests can contain a Hero Token of a Bronze Hero, Silver Hero or Gold Hero. More common rewards are ![]() Gold,
Gold, ![]() Hammers or an
Hammers or an ![]() Evo.
Evo.
XP Island, Gold Island, Evo Island and Boss Island
For additional information on the individual islands, visit the following pages: ![]() XP Island,
XP Island, ![]() Gold Island,
Gold Island,![]() Evo Island and Boss Island.
Evo Island and Boss Island.
These are special Dungeons that specifically allow you to get Gold, Potions, Evos and Epics. Evo Island, XP Island and Gold Island Dungeons are useable once every day. Keep in mind though, the Dungeons in Gold Island and XP Island are for players with higher level Heroes.
Evo Island and Boss Island are slightly different from the other two Islands. Evo Island is accessible on Monday to Friday only. Besides, every day from Monday to Friday, each day will have a different Element (Monday: Dark, Tuesday: Water, Wednesday: Fire, Thursday: Nature, Friday: Light. This is for both enemies and Evos). Boss Island Dungeons require 8 Loot Keys to Quick Loot but can be run through more than once every day.
Epic Dungeons
In Epic Dungeons (5-10 Reflection Halls, 11-7 Lair of the Lich, 16-10 Devourer of Flames and 21-10 Garden of Evil),(Normal Mode and Challenge Mode ONLY) the player's Heroes fight without the assistance of Friends' Champions. These Dungeons are not only the last levels of their respective Chapters (therefore require 7 Stamina to begin), but also significantly more challenging for the player compared to other levels. Potions are allowed in these levels, except the Elixir of Life. That means when your Hero team is defeated in an Epic Dungeon you cannot continue and the battle is over. Epic Dungeons also contain Epic Bosses, which are far deadlier than typical Bosses as they have many more Abilities and their Attacks are significantly strengthened.
Events Dungeons
Events are released every few days and offer challenges in separate ![]() events dungeons where you can earn tokens for featured Heroes. During Portal Events these heroes have an increased appearance rate in
events dungeons where you can earn tokens for featured Heroes. During Portal Events these heroes have an increased appearance rate in ![]() Portal Summons. You can enter event dungeons by tapping on the hourglass or via the event banner.
Portal Summons. You can enter event dungeons by tapping on the hourglass or via the event banner.
Materials
There are 24 materials (including those in Challenge Mode) that can be looted in the corresponding area type of the dungeon. The lesser material is used to craft greater material, Runes and Epics.
| Dungeon Type | ||||
|---|---|---|---|---|
| Crypt | ||||
| Dark Forest | ||||
| Forest | ||||
| Ice Cave | ||||
| Lava Cave | ||||
| Mountain | ||||
Runes

All Rune chests at the end of Campaign Dungeons contain Lesser Runes (Normal Mode), or Improved Runes (Challenge Mode). The rarity of these ![]() Runes is either Common, Uncommon or Rare, with a maximum of 3 stars. The Rune types found in Campaign Dungeons are either Battle, Bulwark, Focus or Life.
Runes is either Common, Uncommon or Rare, with a maximum of 3 stars. The Rune types found in Campaign Dungeons are either Battle, Bulwark, Focus or Life.
Very rarely, after you complete a Dungeon Room, you will find a mysterious Rune chest that when opened, will give you only a random type of Rune.
You can salvage the Runes found in Dungeons and use the Shards and Binders collected from salvaging them to craft basic Runes of better quality (Heroic or Legendary rarity, up to 5 stars) and other, more special types such as Power, Precision, Elusive, Aegis and Destruction. There are also the unique Soul Stealer, Tactics, Insight, Vampiric, Planning and Thought, as well as the extremely powerful Guardian, Corruption, Survivor and Incineration.
Some Runes, such as Warrior, Tank, Healer, Hero, Festive and Community, are only found in events. Duelist and Champion Runes can be obtained from My Dungeon Seasons. See Runes and Rune Type List for more details.
Hammers
Hammers can be obtained from wooden chests found in the middle of any dungeons. You can use these Hammers that you get from completing or Quick Looting dungeons to reinforce your chest in My Dungeon. If you do not reinforce your chest, other players can raid your dungeon and if they win against your defenders, they will steal some of your Daily Rewards for My Dungeon (Gold and Honor).
List of Campaign Dungeons

|
All Dungeons have a BOSS. The baddest of the bad guys!
...Did that sound ominous enough? |
Chapter 1 (Goblin Kingdom)
Recommended level range: 4-6 (Normal), 34-36 (Challenge)
| Chapter | Number of Rooms | Dungeon | Area Type | Hero Token | Celestial Evo | Boss |
|---|---|---|---|---|---|---|
| 1-1 | 3 | Voiceless Hunters | Forest | NA | Chompy | |
| 1-2 | 3 | Tangle of Claws | Forest | NA | JadeHowl | |
| 1-3 | 3 | Catacombs of Muck | Crypt | NA | Prunefingerz | |
| 1-4 | 3 | Feral Alliance | Forest | NA | Buttons, Kaptin Toecrusha | |
| 1-5 | 4 | Bramblelurk Trail | Forest | NA | Bahdizzle Shambottom | |
| 1-6 | 4 | Bramblelurk Keep | Crypt | NA | Chief JubJub |
Chapter 2 (The Cursed Lands)
Recommended level range: 6-8 (Normal), 36-38 (Challenge)
| Chapter | Number of Rooms | Dungeon | Area Type | Hero Token | Celestial Evo | Boss |
|---|---|---|---|---|---|---|
| 2-1 | 3 | Molten Burrows | Lava Cave | Rogar Stonecrusher | NA | Terragor |
| 2-2 | 4 | Steaming Wasteland | Lava Cave | Nitpick | NA | Jord the Twisted |
| 2-3 | 3 | Empty Cages | Crypt | Kobal the Pestilent | NA | Taskmaster Girr |
| 2-4 | 3 | Scorched Homestead | Lava Cave | Torchy (Normal), Overlord Executum (Challenge) | NA | Derrick the Forsaken, Aldar the Mad |
| 2-5 | 5 | Lake of Slag | Lava Cave | Squinch | NA | Plexor |
| 2-6 | 5 | Mage Tower | Crypt | Selwyn the Enduring | NA | Apprentice Volthael |
| 2-7 | 4 | Pillar of Command | Crypt | Chief NubNub | NA | Patches, Lord Maulzenvar |
| 2-8 | 6 | Throne of Ash | Lava Cave | Life Reaper Brom (Normal), Pignius Maximus (Challenge) | NA | General Eclipse |
Chapter 3 (Dwarven Kingdom)
Recommended level range: 8-9 (Normal), 38-39 (Challenge)
| Chapter | Number of Rooms | Dungeon | Area Type | Hero Token | Celestial Evo | Boss |
|---|---|---|---|---|---|---|
| 3-1 | 4 | Frostridge Pass | Ice Cave | NA | Bonepile Giant x3 | |
| 3-2 | 4 | Permafrost Mines | Ice Cave | NA | Norgen Hillwatch | |
| 3-3 | 4 | Bonechilled Quarry | Ice Cave | NA | Morogar Championfoot | |
| 3-4 | 3 | The Runeforge | Lava Cave | NA | Tiny | |
| 3-5 | 6 | Stonehelm Citadel | Crypt | NA | Rukas Grimbelly |
Chapter 4 (Core of the World)
Level range: 10-12 (Normal), 40-42 (Challenge)
| Chapter | Number of Rooms | Dungeon | Area Type | Hero Token | Celestial Evo | Boss |
|---|---|---|---|---|---|---|
| 4-1 | 3 | The Land Beneath | Lava Cave | Willow Swift | NA | Avaricious Snork |
| 4-2 | 4 | Beastmen Village | Crypt | Shadowblade | NA | Merciless Argor |
| 4-3 | 4 | Magma Fields | Lava Cave | Jabber Clenchjaw | NA | Yirishi Reborn |
| 4-4 | 4 | Icy Core | Ice Cave | Phemus | NA | Urg Underbite, Grol Frostbite |
| 4-5 | 4 | Mercenary Fortress | Crypt | Rogar Stonecrusher (Normal), Therand Fiddlestrom (Challenge) | NA | General Raza |
| 4-6 | 3 | Shimmering Caves | Ice Cave | Abigail the Brutal | NA | Nargle Slipjaw |
| 4-7 | 3 | Icy Hollow | Ice Cave | Black Diamond (Normal), Masuta Kira (Challenge) | NA | Yirishi Reborn |
Chapter 5 (The Mystical Valley)
Recommended level range: 12-16 (Normal), 42-46 (Challenge)
| Chapter | Number of Rooms | Dungeon | Area Type | Hero Token | Celestial Evo | Boss |
|---|---|---|---|---|---|---|
| 5-1 | 4 | Crimson Woods | Forest | Yasmin Bloom | NA | Buttons |
| 5-2 | 3 | War Torn Village | Lava Cave | Stone Fist | NA | Cursed Blade |
| 5-3 | 3 | Jade Forest | Forest | Nitpick | NA | Jasper Eight |
| 5-4 | 4 | Mystic Vale | Forest | Tsume | NA | Ninshi Otsuka |
| 5-5 | 4 | Shogunate Fortress | Crypt | Zurk (Normal), Overlord Executum (Challenge) | NA | Amatsu Takeda |
| 5-6 | 3 | Silent Cavern | Ice Cave | Squinch | NA | Sugimoto Shosino |
| 5-7 | 4 | Timeless Frost | Ice Cave | Sir William | NA | Hashima |
| 5-8 | 6 | Spirit's Rest | Ice Cave | Chief NubNub | NA | Frostwing Monarch |
| 5-9 | 3 | Frozen Wastes | Ice Cave | Torchy | Brawny Evo | Frost Titan, Pinesap Titan |
| 5-10 | 5 | Ice Cave | Phenol Thoxian (Normal), Icebloom (Challenge) | NA | Kang-Kung |
Chapter 6 (Defiled Woodland)
Recommended level range: 18-19 (Normal), 48-49 (Challenge)
| Chapter | Number of Rooms | Dungeon | Area Type | Hero Token | Celestial Evo | Boss |
|---|---|---|---|---|---|---|
| 6-1 | 4 | Plagued Land | Lava Cave | Kobal the Pestilent | NA | Uno Hexium |
| 6-2 | 3 | Dark Wood | Dark Forest | Squinch | NA | Lord Barthus |
| 6-3 | 5 | Fire Rot | Lava Cave | Mangle Jaw (Normal), Therand Fiddlestrom (Challenge) | Jewelled Evo | Lord Devoros, |
| 6-4 | 4 | Forsaken Keep | Crypt | Selwyn the Enduring | NA | Scarlet Bloodborne, Jade Envilyn |
| 6-5 | 4 | Under Wood | Dark Forest | Ekko | NA | Gagos the Traitor King |
| 6-6 | 6 | Necrotic Chambers | Crypt | Yokozuna | NA | Ferryman |
Chapter 7 (Crusaders' Vanguard)
Recommended level range: 20-21 (Normal), 50-51 (Challenge)
| Chapter | Number of Rooms | Dungeon | Area Type | Hero Token | Celestial Evo | Boss |
|---|---|---|---|---|---|---|
| 7-1 | 3 | Noble Village | Forest | Abigail the Brutal | Earth Sisters Evo | Duchess Terra |
| 7-2 | 4 | The Farm Lands | Forest | Willow Swift (Normal), Dagrund Blacksmoke (Challenge) | Spirit Evo | Chi the Light Spirit |
| 7-3 | 5 | Supply Route | Crypt | Zurk | Valkyrie Evo | Sir Adam,
Rose Devereux |
| 7-4 | 4 | Elite Garrison | Crypt | Jabber Clenchjaw | Stormwind Evo | Leoric the Brave |
| 7-5 | 6 | The Vanguard | Forest | Ignus the Mad | Spirit Evo | The Archangel |
Chapter 8 (The Warmachine)
Recommended level range: 21-24 (Normal), 51-54 (Challenge)
Quest Rewards: 8x ![]() Lady Nimriel,
Lady Nimriel, ![]() 80,000 gold
80,000 gold
| Chapter | Number of Rooms | Dungeon | Area Type | Hero Token | Celestial Evo | Boss |
|---|---|---|---|---|---|---|
| 8-1 | 3 | Blazing Farmlands | Lava Cave | Rogar Stonecrusher | NA | Rognog Blisterbut |
| 8-2 | 4 | War Front | Dark Forest | Phemus | Caveborn Evo | Captain Dedric |
| 8-3 | 5 | The Second Wave | Lava Cave | Stone Fist (Normal), Samurai Takumi (Challenge) | NA | Nalthune, Major Bradox |
| 8-4 | 3 | Frozen Crypts | Ice Cave | Nitpick | Stormwind Evo | Jubal Moss |
| 8-5 | 3 | Goblin Hordes | Forest | Yasmin Bloom | Caveborn Evo | Hubuju Stumblebum |
| 8-6 | 6 | The Infinite Army | Lava Cave | Selwyn the Enduring | NA | Oson the Infinite |
| 8-7 | 5 | Hope's End | Lava Cave | Phemus (Normal), Indigo (Challenge) | NA | World Eater Tharox, Major Bradox |
Chapter 9 (Unholy Kingdom)
Recommended level range: 24-26 (Normal), 54-56 (Challenge)
Quest Rewards: 8x ![]() Lady Nimriel,
Lady Nimriel, ![]() 90,000 gold
90,000 gold
| Chapter | Number of Rooms | Dungeon | Area Type | Hero Token | Celestial Evo | Boss |
|---|---|---|---|---|---|---|
| 9-1 | 4 | Undying Land | Lava Cave | Tsume | Incendiary Evo | Count Rend |
| 9-2 | 3 | Sleepless Respite | Ice Cave | Kobal the Pestilent | Moonlight Evo | Demora Ametryst |
| 9-3 | 4 | The Black Fortress | Crypt | Torchy (Normal), Balog the Loud (Challenge) | Valkyrie Evo | Chaos Lord Victus |
| 9-4 | 4 | Shadow Gate | Crypt | Squinch | Arcane Evo | Greater Frost Titan |
| 9-5 | 6 | Unholy Capitol | Crypt | Shadowblade (Normal), Julius (Challenge) | Earth Sisters Evo | Overlord Absalom |
Chapter 10 (Infernal Barrens)
Recommended level range: 26-28 (Normal), 56-58 (Challenge)
Quest Rewards: 8x ![]() Lady Nimriel,
Lady Nimriel, ![]() 100,000 gold
100,000 gold
| Chapter | Number of Rooms | Dungeon | Area Type | Hero Token | Celestial Evo | Boss |
|---|---|---|---|---|---|---|
| 10-1 | 3 | The Inferno | Lava Cave | Sir William | Jewelled Evo | Insatiable Brogg |
| 10-2 | 3 | Torture Chambers | Crypt | Nitpick | Brawny Evo | Gamor Snorts |
| 10-3 | 4 | Demon's Breath | Lava Cave | Mangle Jaw (Normal), Augustus (Challenge) | NA | Carnage, Eragos (Challenge Mode only) |
| 10-4 | 4 | Cursed Tower | Crypt | Chief NubNub | NA | Eragos |
| 10-5 | 5 | Infernal Bastion | Crypt | Phenol Thoxian | NA | Eragos, Zethos |
Chapter 11 (Necropolis)
Recommended level range: 28-32 (Normal), 58-62 (Challenge)
| Chapter | Number of Rooms | Dungeon | Area Type | Hero Token | Celestial Evo | Boss |
|---|---|---|---|---|---|---|
| 11-1 | 3 | Undead Encampment | Ice Cave | Ekko | NA | Lazareth |
| 11-2 | 4 | Traitors Retreat | Ice Cave | Yasmin Bloom | Caveborn Evo | Emerald Zero |
| 11-3 | 5 | Defiled Sanctuary | Crypt | Rogar Stonecrusher | NA | Vetrix |
| 11-4 | 5 | Summit of Power | Crypt | Abigail the Brutal (Normal), Malice (Challenge) | Moonlight Evo | Utica the Forgotten |
| 11-5 | 5 | Plagued Sewers | Crypt | Phemus | Incendiary Evo | Mutters, Howling Mad Jibbers |
| 11-6 | 5 | Festering Halls | Crypt | Stone Fist | Stormwind Evo | Utica the Forgotten |
| 11-7 | 5 | Crypt | Life Reaper Brom | Crypt Evo | Carnage, Knight Creeper Immortal, Lich |
Chapter 12 (Imperial Border)
Recommended level range: 32-33 (Normal), 62-63 (Challenge)
| Chapter | Number of Rooms | Dungeon | Area Type | Hero Token | Celestial Evo | Boss |
|---|---|---|---|---|---|---|
| 12-1 | 4 | Purged Lands | Lava Cave | Kobal the Pestilent | Bushido | Omimoru |
| 12-2 | 3 | The Secret Passage | Crypt | Jabber Clenchjaw | NA | Rabid Manhunter x2 |
| 12-3 | 6 | Past the Wall | Forest | Selwyn the Enduring (Normal), Samurai Takumi (Challenge) | Subterranean Evo | Archmage Lumos |
| 12-4 | 5 | Check Point | Forest | Willow Swift | NA | Itsuki Bannin |
| 12-5 | 5 | Warrior Village | Forest | Zurk | Astral Evo | Rakishi |
| 12-6 | 3 | The Arena | Crypt | Black Diamond (Normal), Indigo (Challenge) | NA | Tank the Arena Champ, Seaspray Busho (Challenge Mode only) |
Chapter 13 (The Imperial Quarry)
Recommended level range: 34-35 (Normal), 64-65 (Challenge)
| Chapter | Number of Rooms | Dungeon | Area Type | Hero Token | Celestial Evo | Boss |
|---|---|---|---|---|---|---|
| 13-1 | 4 | Captive Barracks | Crypt | Sir William | NA | Bluddblister |
| 13-2 | 5 | The Furnace | Lava Cave | Nitpick (Normal), Icepick (Challenge) | NA | Iron Smith Brutus |
| 13-3 | 3 | Abandoned Pass | Ice Cave | Zurk | NA | Wolvar Stalker |
| 13-4 | 4 | The Abyss | Lava Cave | Chief NubNub (Normal), Alexandros (Challenge) | NA | Aedric |
Chapter 14 (Crimson Empire)
Recommended level range: 35-38 (Normal), 65-68 (Challenge)
| Chapter | Number of Rooms | Dungeon | Area Type | Hero Token | Celestial Evo | Boss |
|---|---|---|---|---|---|---|
| 14-1 | 4 | Flooded Camp | Forest | Zurk | NA | High Priestess Flora |
| 14-2 | 4 | Sacred Forest | Forest | Squinch | Astral Evo | Tai Mei Senpai |
| 14-3 | 5 | Scorched Ice | Ice Cave | Ekko | Crypt Evo | Kobal the Pestilent |
| 14-4 | 4 | Raiders Camp | Dark Forest | Mangle Jaw (Normal), Pignius Maximus (Challenge) | NA | Cobalt Ten |
| 14-5 | 5 | Pillaged Village | Lava Cave | Jabber Clenchjaw | Bushido Evo | Hiroto Senshu |
| 14-6 | 6 | The Vault | Crypt | Abigail the Brutal | Arcane Evo | Atlas Vanguard, Guard Captain Ori |
| 14-7 | 4 | Imperial Dungeon | Crypt | Willow Swift | Mind's Eye Evo | Nori Kanshu, Hattori Ono |
| 14-8 | 6 | Emperor's Palace | Crypt | Tsume (Normal), Sifu Jianzhi (Challenge) | Diamond Evo | Emperor Tao |
Chapter 15 (Doomed Wastes)
Recommended level range: 38-40 (Normal), 68-70 (Challenge)
| Chapter | Number of Rooms | Dungeon | Area Type | Hero Token | Celestial Evo | Boss |
|---|---|---|---|---|---|---|
| 15-1 | 3 | Empty Crypts | Lava Cave | Phemus | NA | Ninshi Otsuka, Fallen Emperor |
| 15-2 | 4 | Marauder Lands | Ice Cave | Selwyn the Enduring | NA | Marauder Lord |
| 15-3 | 5 | Trail of Bones | Ice Cave | Yasmin Bloom | Coldfire Evo | Josiah |
| 15-4 | 4 | Demon's Den | Lava Cave | Kobal the Pestilent (Normal), Viperia (Challenge) | Runed Evo | Aedric |
| 15-5 | 4 | Marauder Arena | Dark Forest | Ignus the Mad | NA | Torgo Arena Champ |
| 15-6 | 3 | Smoldering Trail | Lava Cave | Rogar Stonecrusher | NA | Snorgal le Swine |
| 15-7 | 6 | Fire Lord Temple | Lava Cave | Yokozuna | NA | Kasai |
Chapter 16 (Dragon Lord Summit)
Recommended level range: 40-46 (Normal), 70-72 (Challenge)
| Chapter | Number of Rooms | Dungeon | Area Type | Hero Token | Celestial Evo | Boss |
|---|---|---|---|---|---|---|
| 16-1 | 5 | Tar Pits | Lava Cave | Zurk | Subterranean Evo | Magmucus |
| 16-2 | 4 | Sulfur Marsh | Dark Forest | Nitpick | NA | Headcrusha |
| 16-3 | 3 | Frozen Brimstone | Ice Cave | Stone Fist | NA | Laguna |
| 16-4 | 4 | Frost Fire Chasm | Ice Cave | Sir William | Mind's Eye Evo | Ash the Inferno, Ferro the Blizzard |
| 16-5 | 6 | Temple Ruins | Crypt | Jabber Clenchjaw (Normal), Cobressa (Challenge) | NA | Asrogar the Ancient |
| 16-6 | 5 | Barren Wastes | Lava Cave | Torchy | NA | Mutters |
| 16-7 | 5 | Bone Blight | Lava Cave | Abigail the Brutal | Coldfire Evo | Utica the Forgotten |
| 16-8 | 3 | Scorching Ruins | Lava Cave | Ekko | NA | Avaricious Snork |
| 16-9 | 6 | Blazing Inferno | Lava Cave | Willow Swift | NA | Bloodtusk, Hunkar |
| 16-10 | 4 | Lava Cave | Phenol Thoxian (Normal), General Krexx (Challenge) | NA | Sulfurious |
Chapter 17 (Rune Stone Mountains)
Recommended level range: 46-48 (Normal), 72 (Challenge)
Required Player Level: 38
| Chapter | Number of Rooms | Dungeon | Area Type | Hero Token | Celestial Evo | Boss |
|---|---|---|---|---|---|---|
| 17-1 | 3 | Harrowing Cliffs | Mountain | Phemus | Diamond Evo | Water Snake, White Crane |
| 17-2 | 4 | Singing Peaks | Mountain | Mangle Jaw | Runed Evo | Luminus Thundershout |
| 17-3 | 4 | Silent Caves | Ice Cave | Tsume (Normal), Hansuke Undying (Challenge) | Coldfire Evo | June Song |
| 17-4 | 5 | Rune Shrine | Mountain | Yasmin Bloom | NA | Flame Master Nyx |
| 17-5 | 5 | The Rune Temple | Mountain | Black Diamond (Normal), Bauble (Challenge) | Shadow Evo | Stone Master Kahal |
Chapter 18 (Land of Giants)
Recommended level range: 48-50 (Normal), 72 (Challenge)
Required Player Level: 40
| Chapter | Number of Rooms | Dungeon | Area Type | Hero Token | Celestial Evo | Boss |
|---|---|---|---|---|---|---|
| 18-1 | 3 | Creon's Trees | Forest | Squinch | Infinity Evo | Deimos, Erebus |
| 18-2 | 5 | Creon's Rocks | Mountain | Kobal the Pestilent | NA | Ivar Petrock |
| 18-3 | 4 | Creon's Ice | Ice Cave | Selwyn the Enduring (Normal), Kai Makani (Challenge) | NA | Hydro Osmium |
| 18-4 | 3 | Creon's Arena | Lava Cave | Rogar Stonecrusher | NA | Pallas |
| 18-5 | 4 | Creon's Home | Crypt | Life Reaper Brom (Normal), Lily Blossom (Challenge) | Runed Evo | Creon |
Chapter 19 (The Mystical Highlands)
Recommended level range: 51-53 (Normal), 72 (Challenge)
Required Player Level: 45
| Chapter | Number of Rooms | Dungeon | Area Type | Hero Token | Celestial Evo | Boss |
|---|---|---|---|---|---|---|
| 19-1 | 4 | Cursed Hillside | Mountain | Torchy | Shadow Evo | Nasty Essence x2 |
| 19-2 | 4 | Whisper Wood | Dark Forest | Chief NubNub | NA | Toxic Shiitake |
| 19-3 | 5 | Razor Wind Pass | Forest | Sir William | Infinity Evo | Skirra |
| 19-4 | 4 | Coarse Climb | Mountain | Nitpick (Normal), Zen (Challenge) | NA | Jade Demon Karu |
| 19-5 | 3 | Blistering Summit | Lava Cave | Zurk | NA | War Demon Saru |
| 19-6 | 4 | Demon's Hoard | Crypt | Squinch | NA | Okori Tempest |
| 19-7 | 4 | Deadly Descent | Ice Cave | Stone Fist (Normal), Icepick (Challenge) | NA | Asha Jakki |
Chapter 20 (The Pinnacle)
Recommended level range: 53-56 (Normal), 72 (Challenge)
Required Player Level: 50
| Chapter | Number of Rooms | Dungeon | Area Type | Hero Token | Celestial Evo | Boss |
|---|---|---|---|---|---|---|
| 20-1 | 4 | Celestial Gate | Mountain | Jabber Clenchjaw | NA | San Agatha |
| 20-2 | 5 | Aurora Glade | Forest | Squinch | NA | Magnus |
| 20-3 | 4 | Spirit's Sanctuary | Forest | Abigail the Brutal | NA | Seikatsu the Life Spirit |
| 20-4 | 6 | Sky Temple | Mountain | Ekko (Normal), Archangel Emily (Challenge) | NA | San Andria |
| 20-5 | 4 | Trial of Strength | Crypt | Mangle Jaw | NA | Capra |
| 20-6 | 4 | Trial of Heart | Lava Cave | Willow Swift | NA | Moros |
| 20-7 | 4 | Trial of Wisdom | Ice Cave | Selwyn the Enduring | NA | Alexandros |
| 20-8 | 5 | Pinnacle | Mountain | Ignus the Mad (Normal), Pignius Maximus (Challenge) | NA | Akriel, Aquarius |
Chapter 21 (The Blight)
Level range: 57-61 (Normal), 72 (Challenge)
Required Player Level: 55
| Chapter | Number of Rooms | Dungeon | Area Type | Hero Token | Celestial Evo | Boss |
|---|---|---|---|---|---|---|
| 21-1 | 4 | Dread Wastes | Lava Cave | Phemus | NA | Oddblob |
| 21-2 | 3 | Corrupted Caverns | Ice Cave | Rogar Stonecrusher | NA | Black Hand Matriarch |
| 21-3 | 4 | Witherbloom | Ice Cave | Stone Fist | NA | Lalonna Tyr |
| 21-4 | 4 | Scarred Lands | Lava Cave | Squinch | NA | Queen Mariel |
| 21-5 | 5 | Hero's End | Crypt | Kobal the Pestilent | NA | Withered Zerras |
| 21-6 | 3 | Splinter Wood | Dark Forest | Yasmin Bloom (Normal), Dhaegon Stonecrusher (Challenge) | NA | Viska |
| 21-7 | 4 | Vile Thorn | Dark Forest | Chief NubNub | NA | Doomcap |
| 21-8 | 4 | Timbersaw | Dark Forest | Tsume | NA | Noxious Shiitake |
| 21-9 | 5 | Path of Darkness | Dark Forest | Torchy | NA | Utica the Forgotten |
| 21-10 | 6 | Dark Forest | Dhaegon Stonecrusher | NA | Root of All Evil |
Read more ...
- XP Island - XP for your Heroes
- Gold Island - Loot great gold treasures
- Evo Island - Catch some rare Celestial Evos
- Boss Island - Make your Heroes epic!